About
About Teable
Teable uses a simple, spreadsheet-like interface to create powerful database applications. Collaborate with your team in real-time, and scale to millions of rows
Template | Roadmap | Discord | Twitter
Quick Guide
- Looking for a quick experience? Select a scenario from the template center and click “Use this template”.
- Seeking high performance? Try the 1 million rows demo to feel the speed of Teable.
- Interested in deploying it yourself? Click Deploy on Railway
🍺 Feature Packed
Everything you need, right out of the box:- Aggregation
- Attachments Preview
- Batch Editing
- Charts
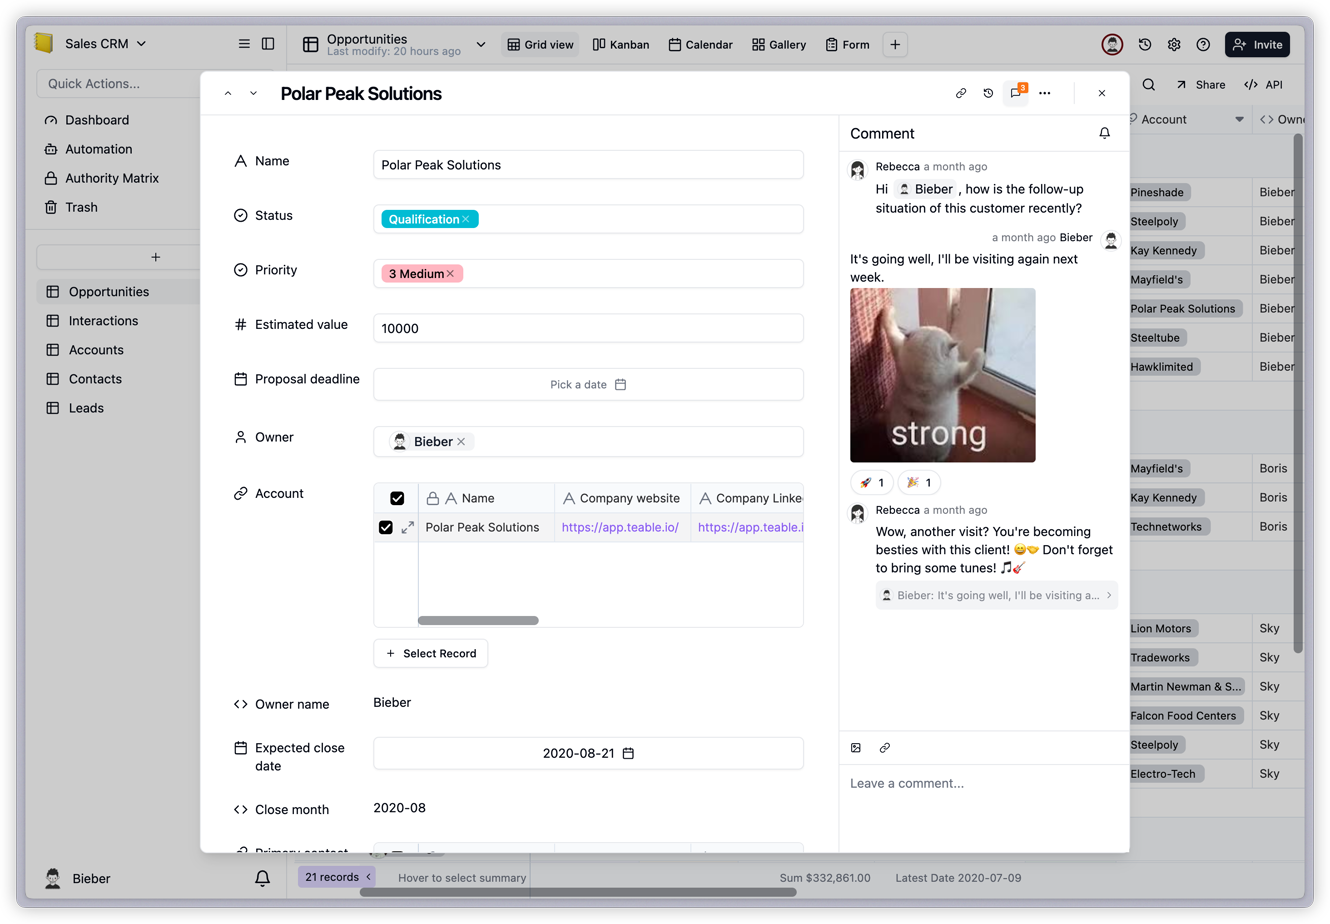
- Comments
- Custom Columns
- Field Conversion
- Filtering
- Formatting
- Formula Support
- Grouping
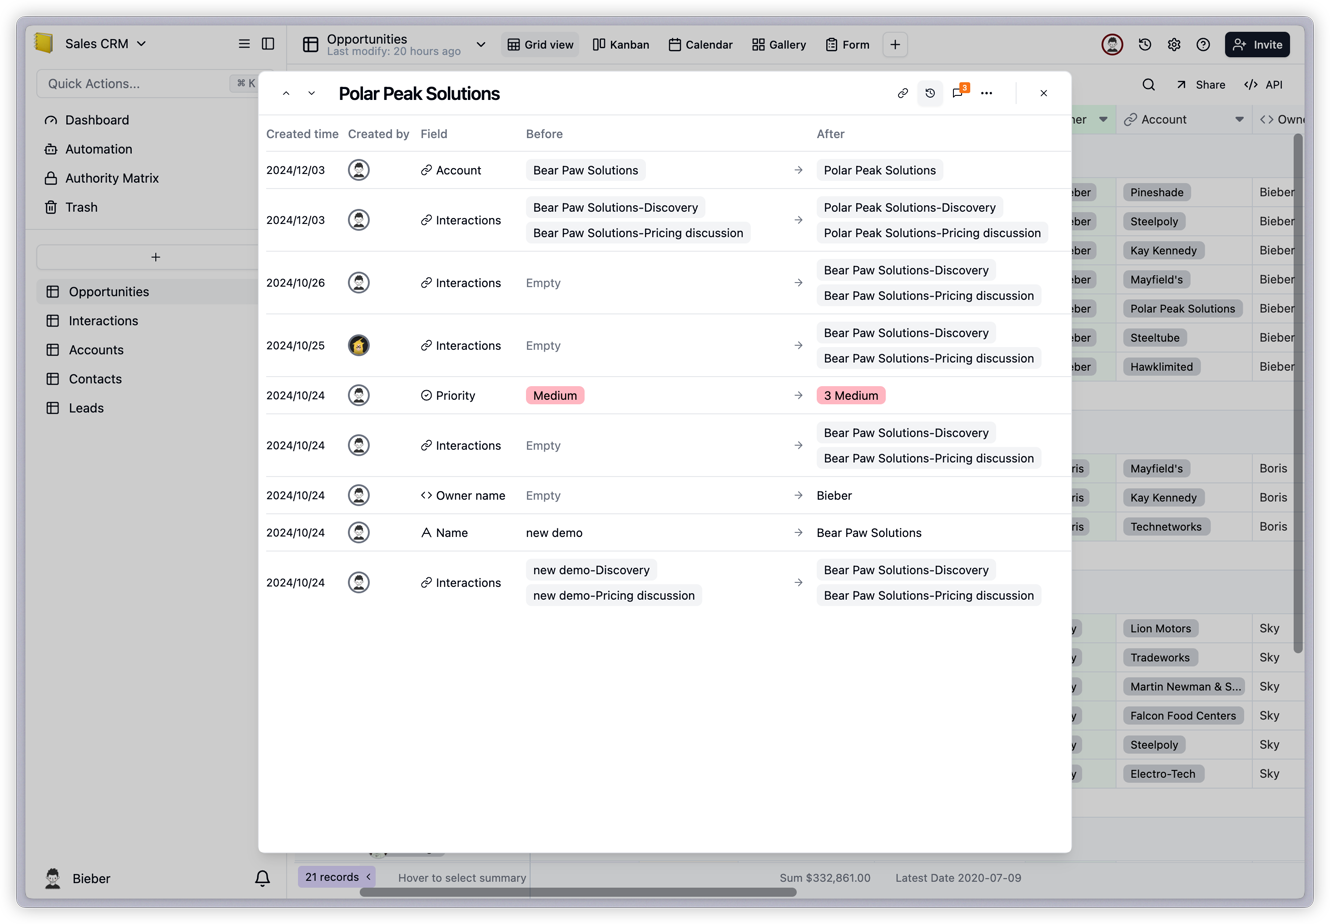
- History
- Import/Export
- Millions of Rows
- Plugins
- Real-time
- Search
- Sorting
- SQL Query
- Undo/Redo
- Validation
🏞️ Multiple Views
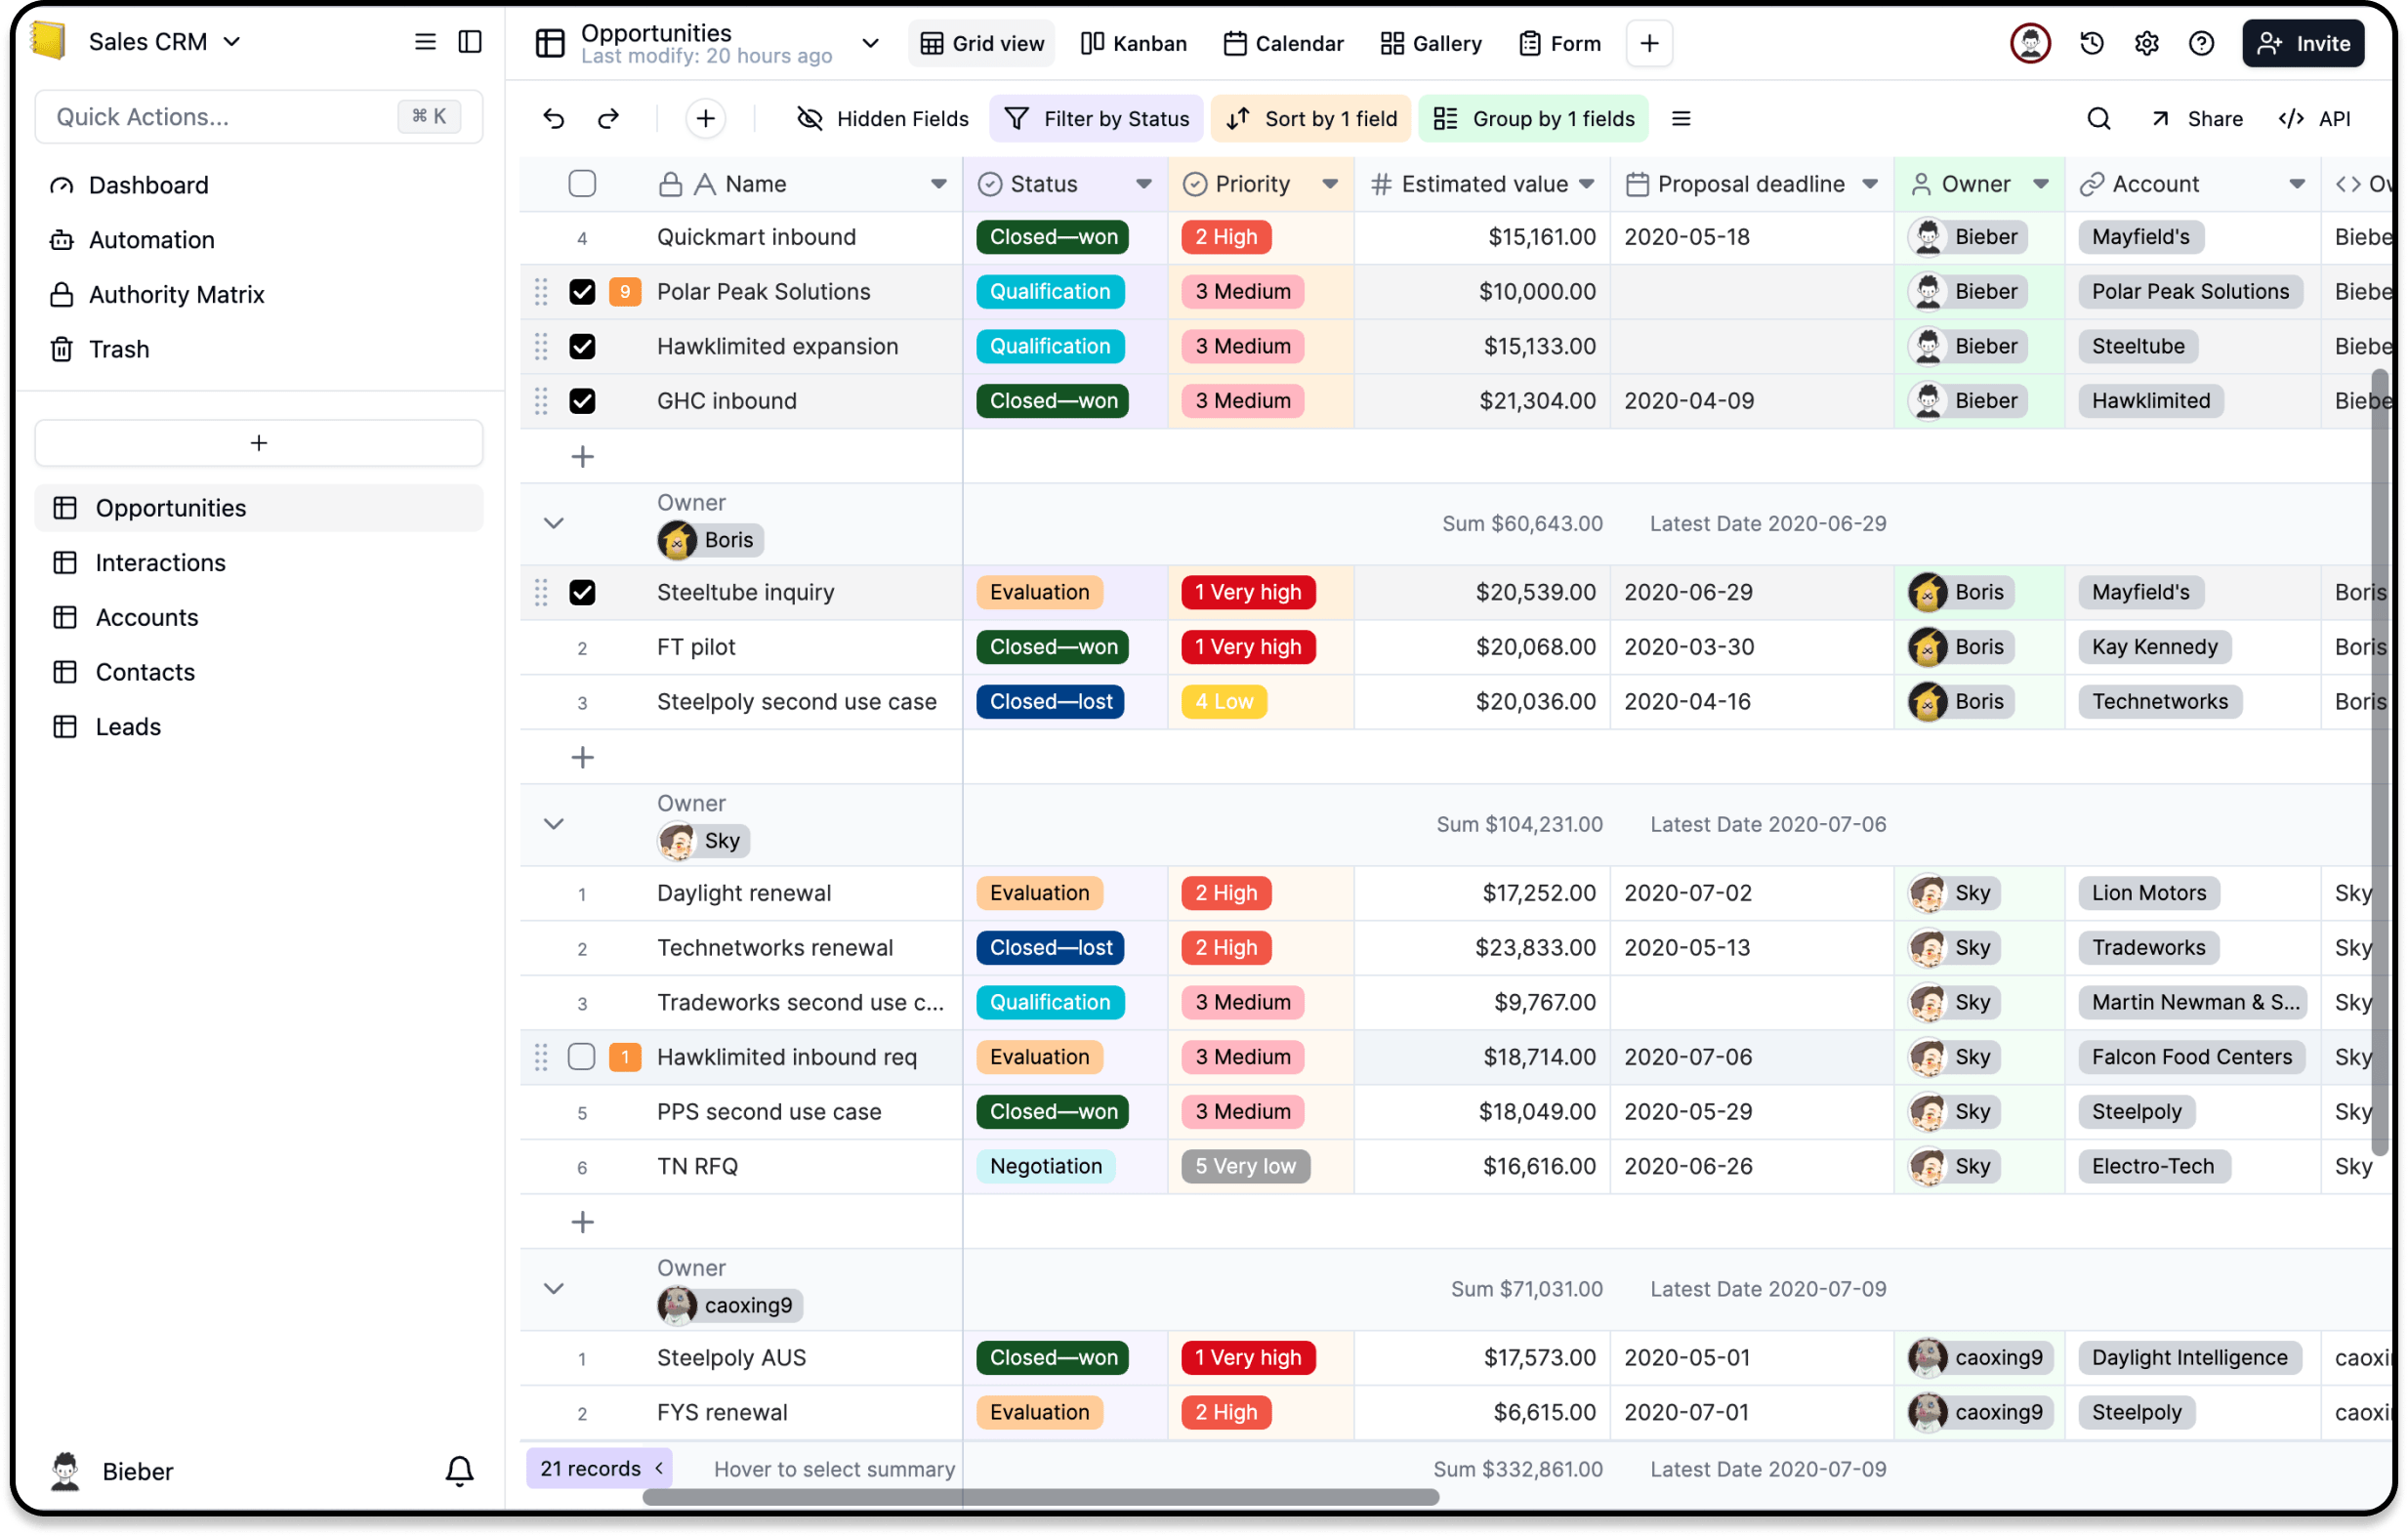
Visualize and interact with data in various ways best suited for their specific tasks.- Grid View
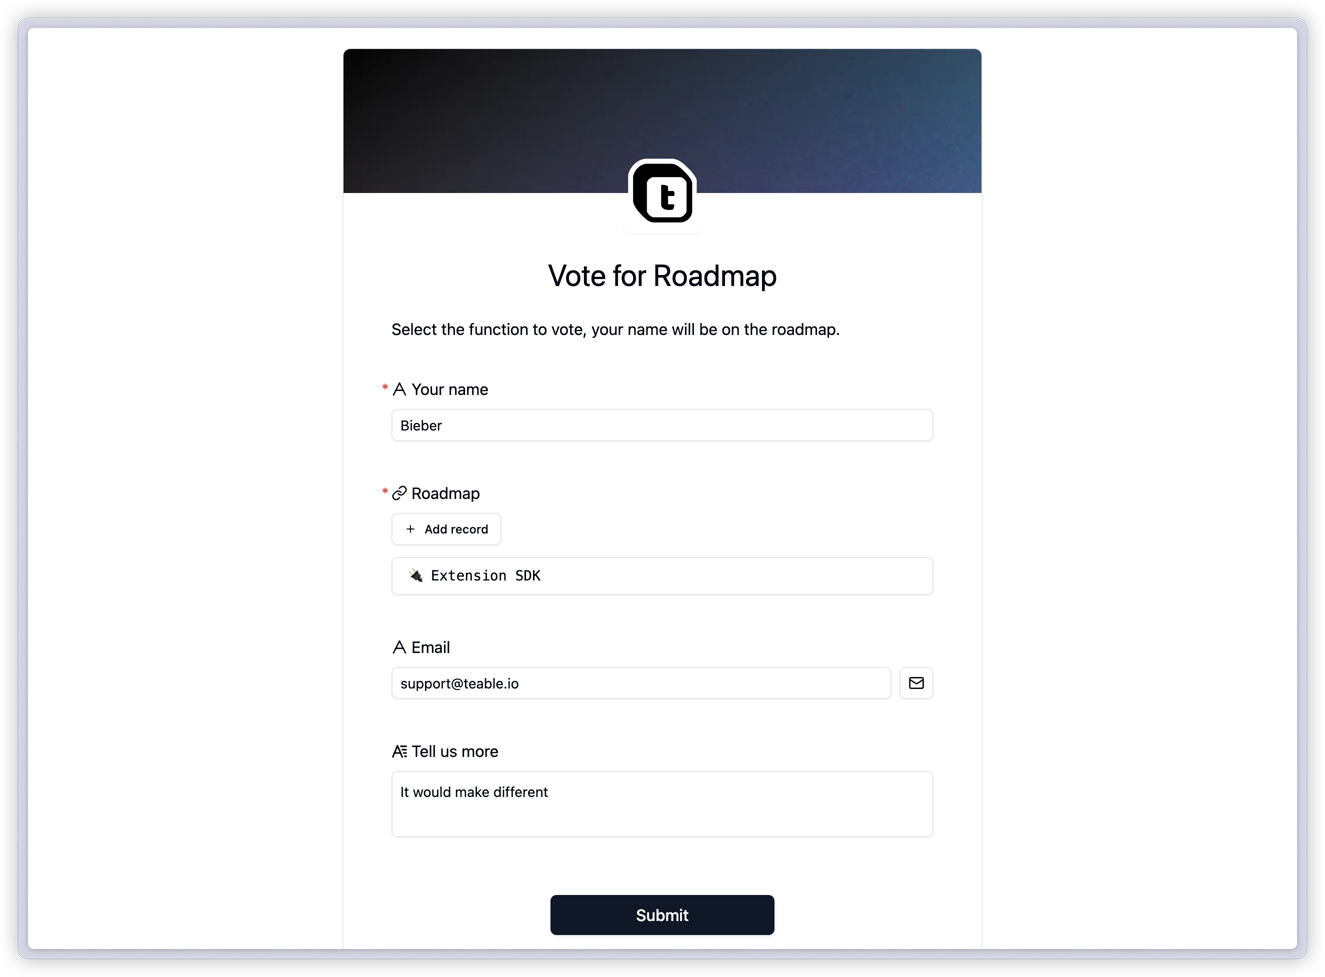
- Form View
- Kanban View
- Gallery View
- Calendar View
 | 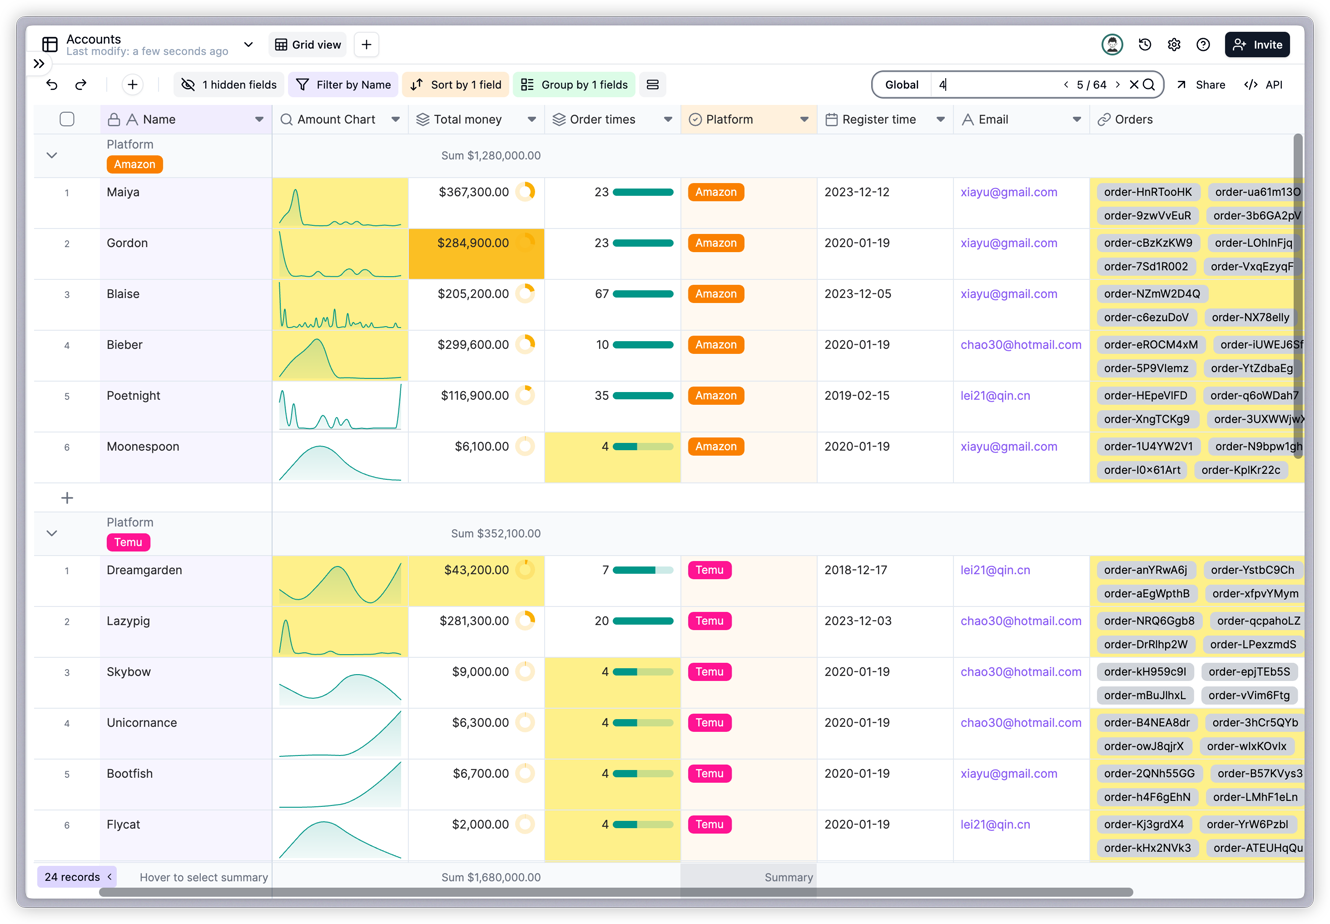 |
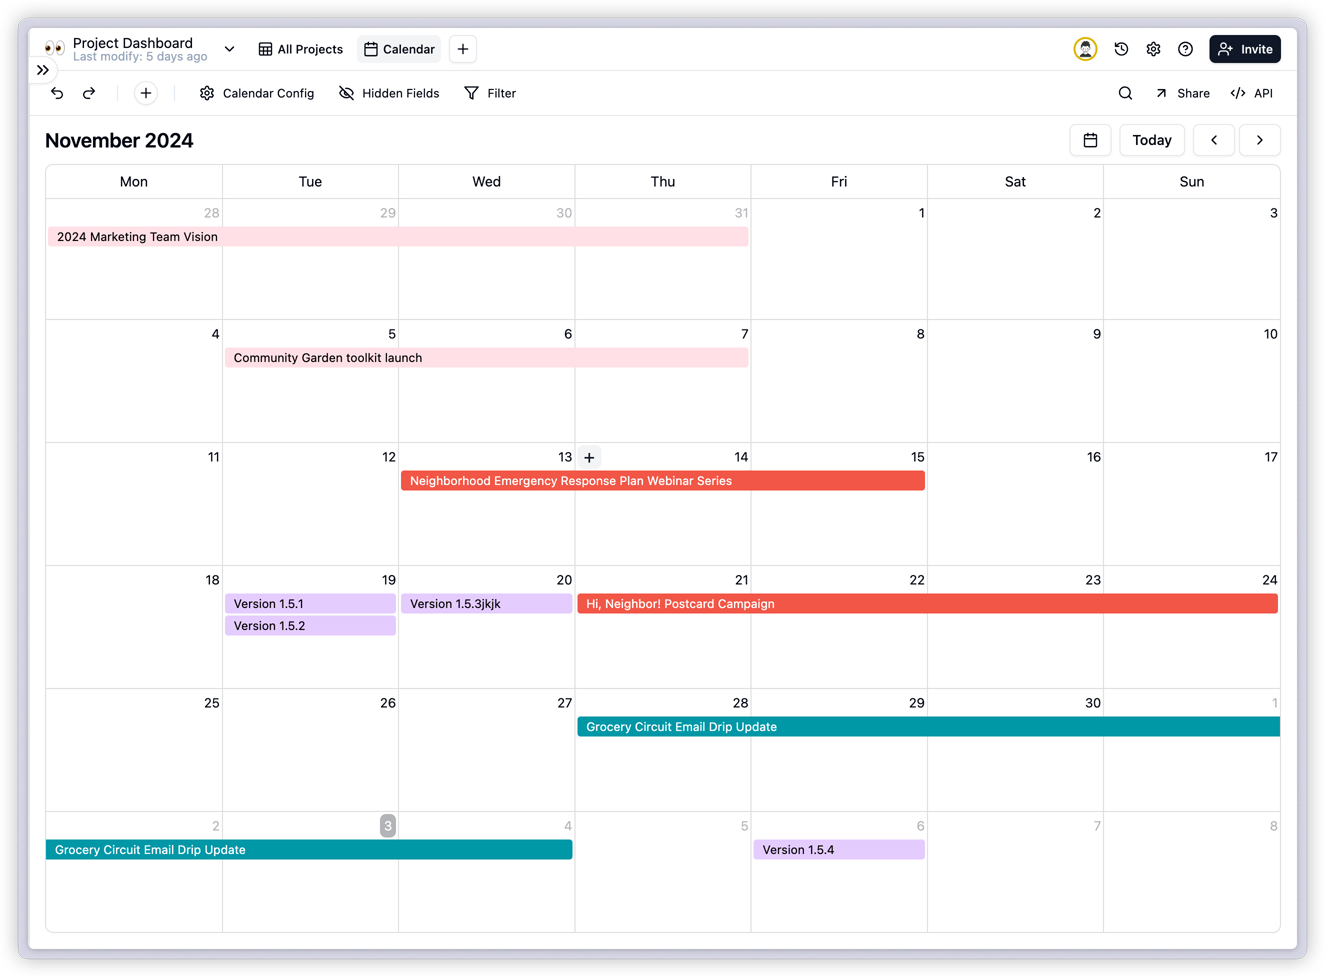 |  |
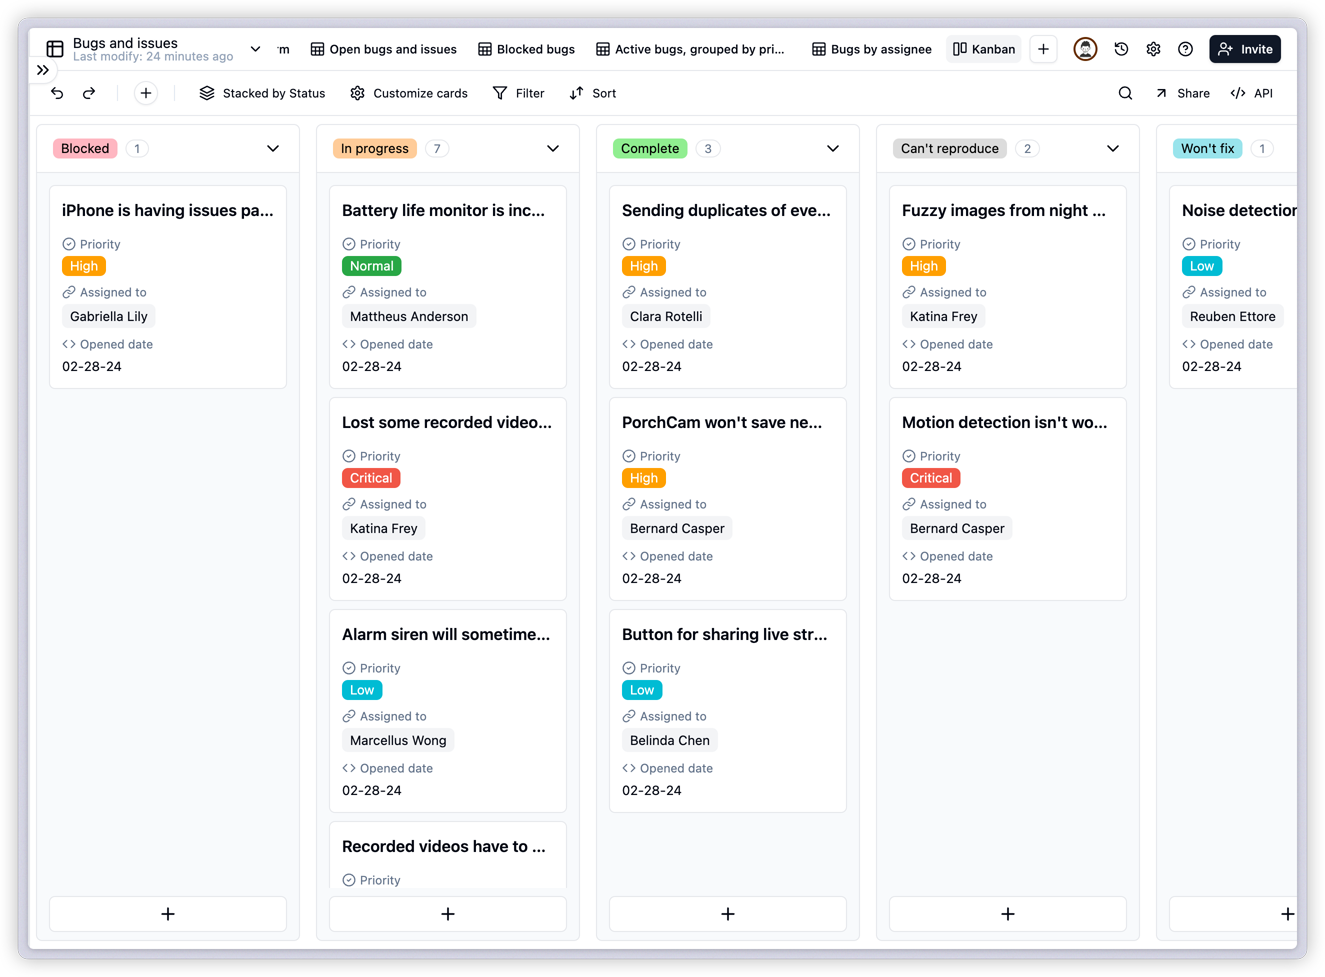 |  |
 |  |
📊 Charts & Dashboard
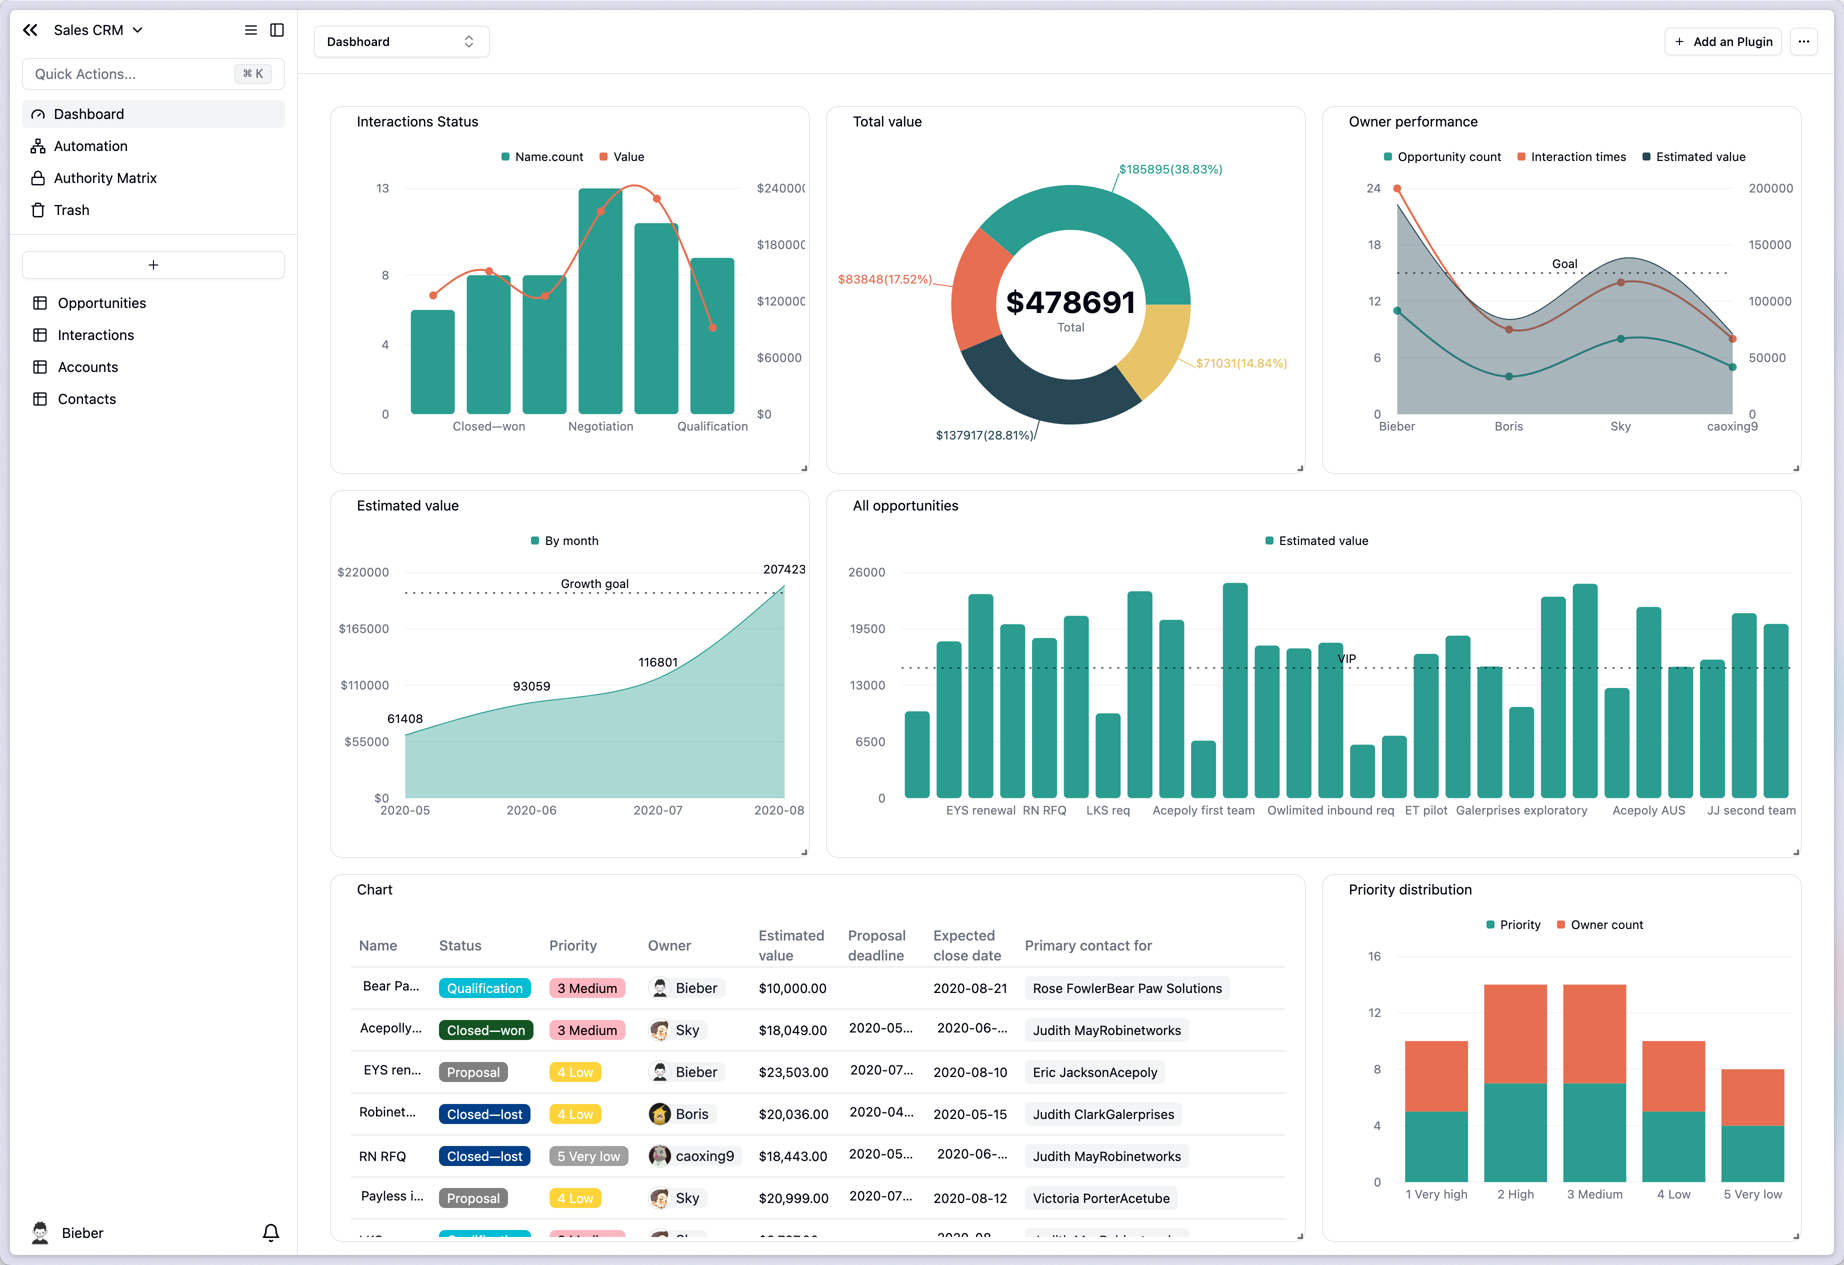 More features coming soon, see our Roadmap
Why Teable?
No-code tools have significantly speed up how we get things done, allowing non-tech users to build amazing apps and changing the way many work and live. People like using spreadsheet-like UI to handle their data because it’s easy, flexible, and great for team collaboration. They also prefer designing their app screens without being stuck with clunky templates. Giving non-techy people the ability to create their software sounds exciting. But that’s just the start:- As businesses expand, their data needs intensify. No one wishes to hear that once their orders reach 100k, they’ll outgrow their current interface. Yet, many no-code platforms falter at such scales.
- Most no-code platforms are cloud-based. This means your important data sits with the provider, and switching to another platform can be a headache.
- Sometimes, no-code tools can’t do what you want because of their limitations, leaving users stuck.
- If a tool becomes essential, you’ll eventually need some tech expertise. But developers often find these platforms tricky.
- Maintaining systems with complex setups can be hard for developers, especially if these aren’t built using common software standards.
- Systems that don’t use these standards might need revamping or replacing, costing more in the long run. It might even mean ditching the no-code route and going back to traditional coding.
What we think the future of no-code products look like
- An interface that anyone can use to build applications easily.
- Easy access to data, letting users grab, move, and reuse their information as they wish.
- Data privacy and choice, whether that’s in the cloud, on-premise, or even just on your local.
- It needs to work for developers too, not just non-tech users.
- It should handle lots of data, so it can grow with your business.
- Flexibility to integrate with other software, combining strengths to get the job done.
- Last, native AI integration to takes usability to the next level.