Authority Matrix
Authority Matrix Practical Guide
Think of the Authority Matrix as a powerful tool. It lets you build precise data access rights for each role on your team, just like assembling building blocks. Don’t worry if it seems complex; we’ll walk you through a common scenario step by step.
Note: The Authority Matrix must be enabled here for your settings to take effect.
Sales Management Scenario
In this scenario, our sales team needs to collaborate on managing customers, orders, and products. Our goals are:- Sales Director: Can view all customer and sales data for high-level oversight but cannot easily change product prices.
- Sales Rep: Can only view and edit their own customers and orders. They can add new customers but cannot delete completed orders.
- Data Entry Clerk: Is responsible for adding new products but cannot modify or delete existing ones, and has no access to customer or order information.
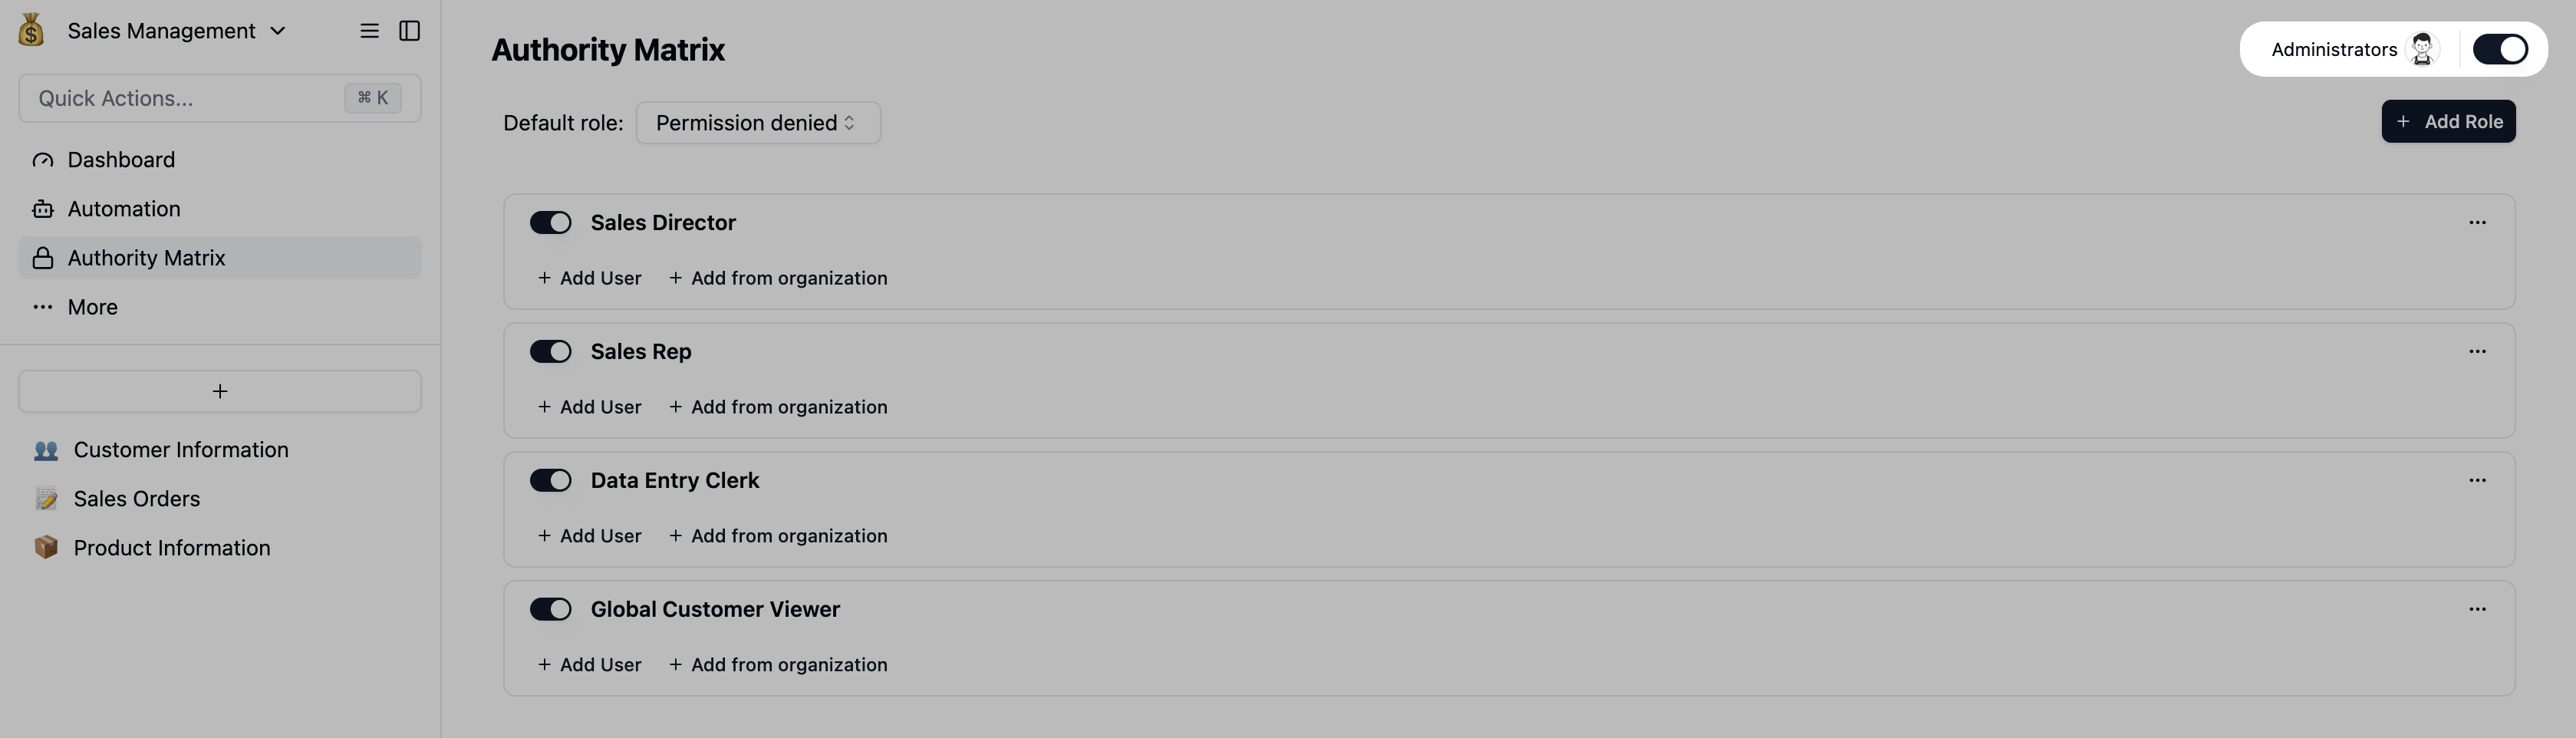
Step 1: Setup and Role Creation
- Enable the Authority Matrix: In your base, find and toggle on the “Authority Matrix”. You and the space administrator will automatically be granted Admin roles.
- Create Roles: Click the
Add Rolebutton in the top-right corner. We’ll create three roles:- Sales Director
- Sales Rep
- Data Entry Clerk
Step 2: Configure Permissions for Each Role
Now, let’s configure granular permissions for each role. We have three tables:Customers, Sales Orders, and Products.
1. Configure the [Sales Director] Role
As the manager, this role needs the highest level of view access.
- For the
CustomersandSales Orderstables:- Record-level Permissions: Enable permissions for the table. Leave the settings at their default to grant full data access.
- For the
Productstable:- Action Permissions: Only check
View recordsandComment on records. This allows the director to see product information without being able to modify it, preventing accidental changes to pricing. - Collaboration: The director can also comment on specific products, which fosters team communication and timely feedback, boosting overall efficiency.
- Click the
Savebutton in the bottom-left corner to apply the settings.
- Action Permissions: Only check

Once a role is created and configured, enable it using the toggle switch to its left. Then, assign team members to the role using theAdding Members to a RoleAdd UserorAdd from Organizationbuttons.
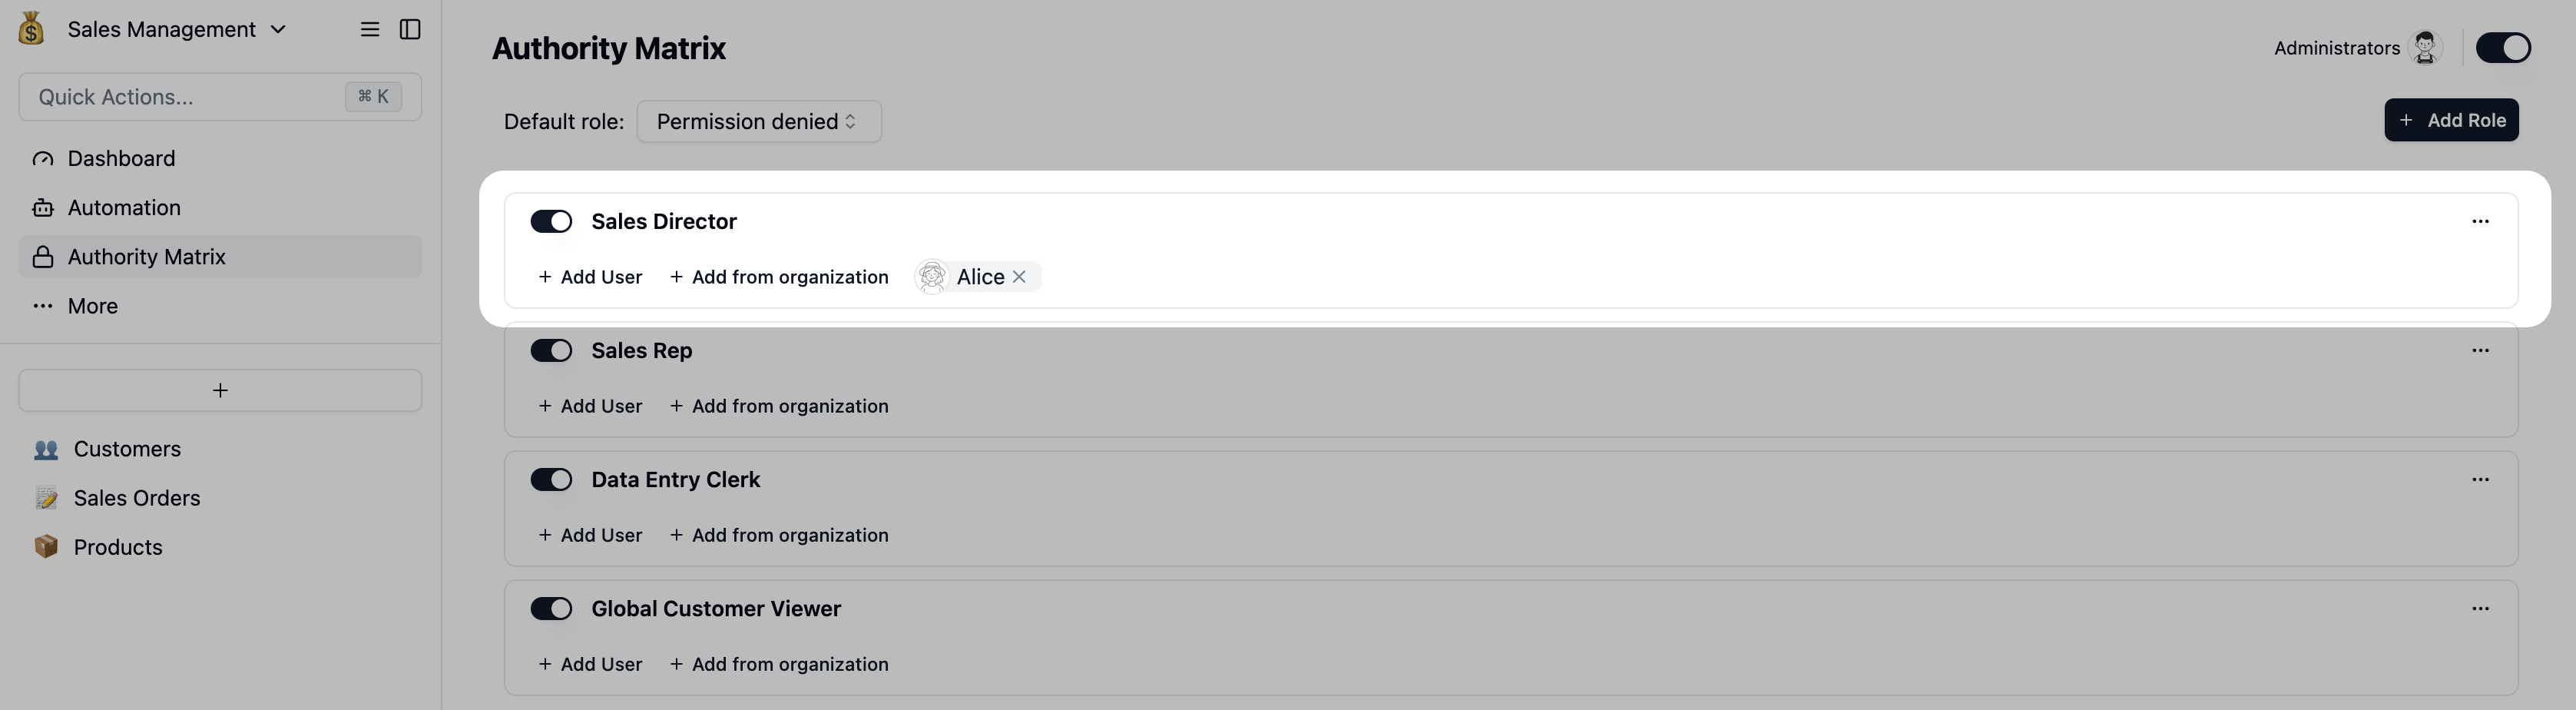 The Sales Director’s View: Once configured, “Sales Director Alice” can view all customer and sales data but is restricted from editing product prices.
2. Configure the [Sales Rep] Role
This is the most critical part of the setup, ensuring data privacy and security.
-
For the
Customerstable:-
Record-level Permissions: This is key! Add a filter where
Sales RepisMe(Current User).
Dynamic Permissions: This means that when “Sales Rep Emily” logs in, he will only see customers where the ‘Sales Rep’ field is set to “Emily”.
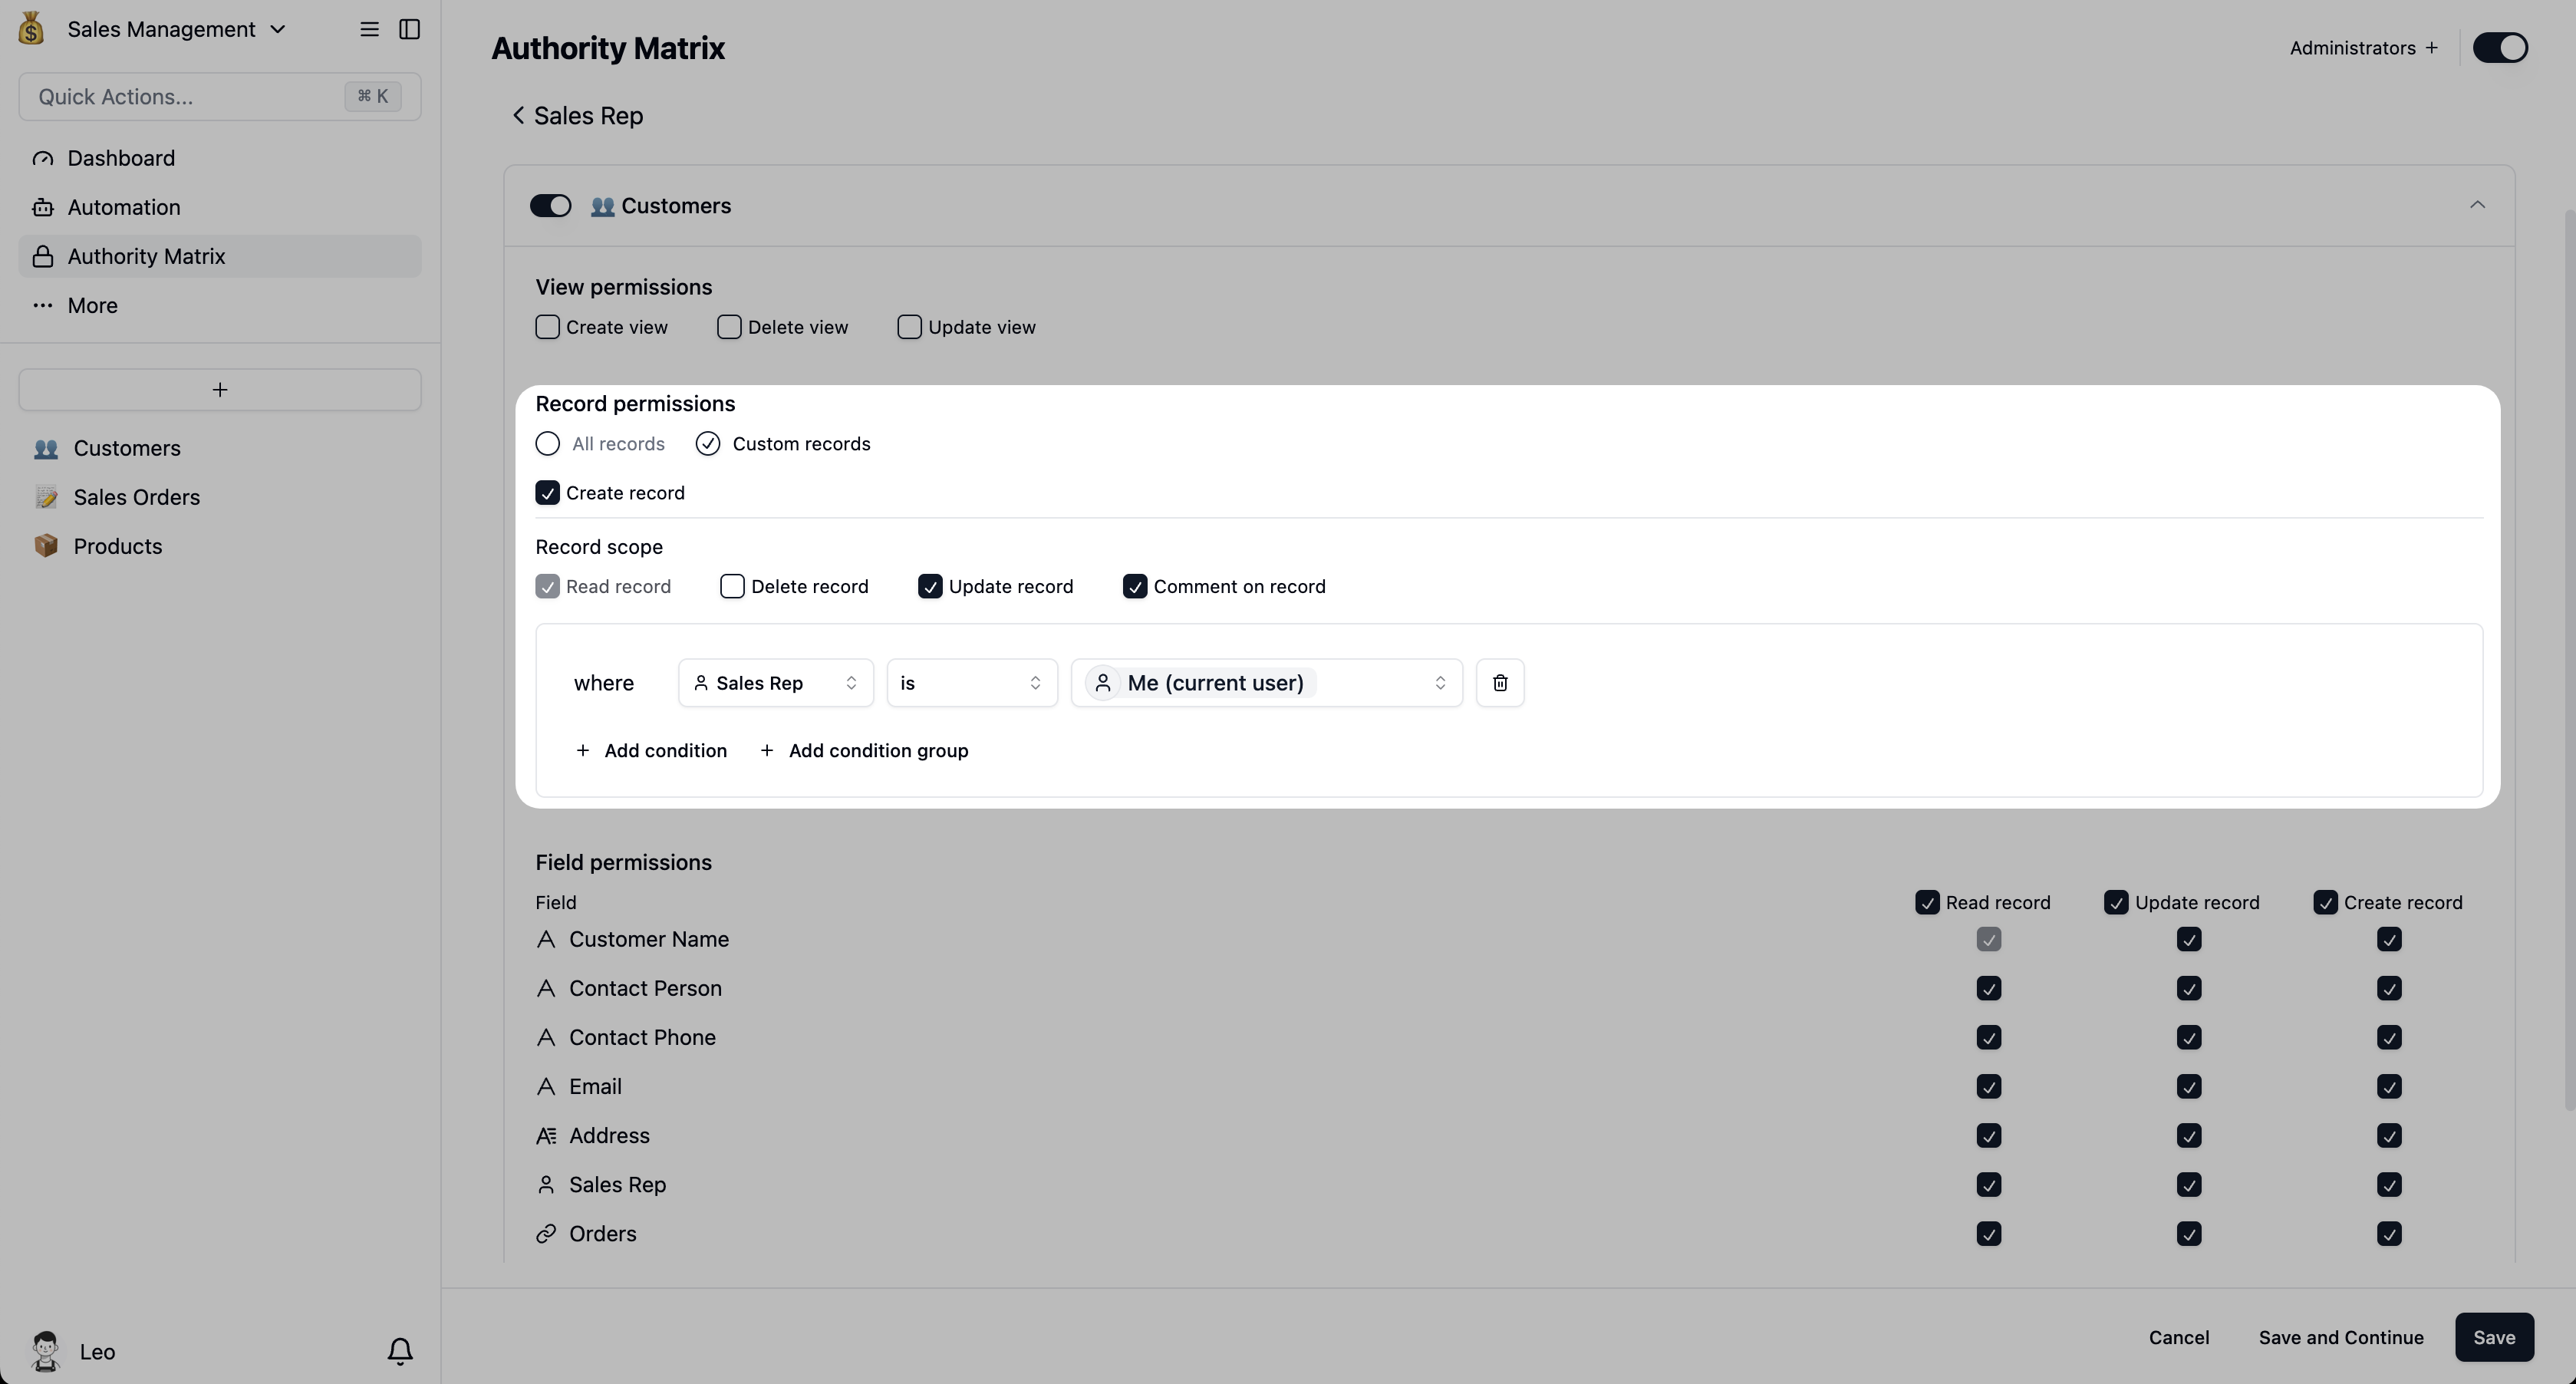
- Action Permissions: Check
View records,Update records, andCreate records. We recommend leavingDelete recordsunchecked to prevent accidental data loss.
-
Record-level Permissions: This is key! Add a filter where
-
For the
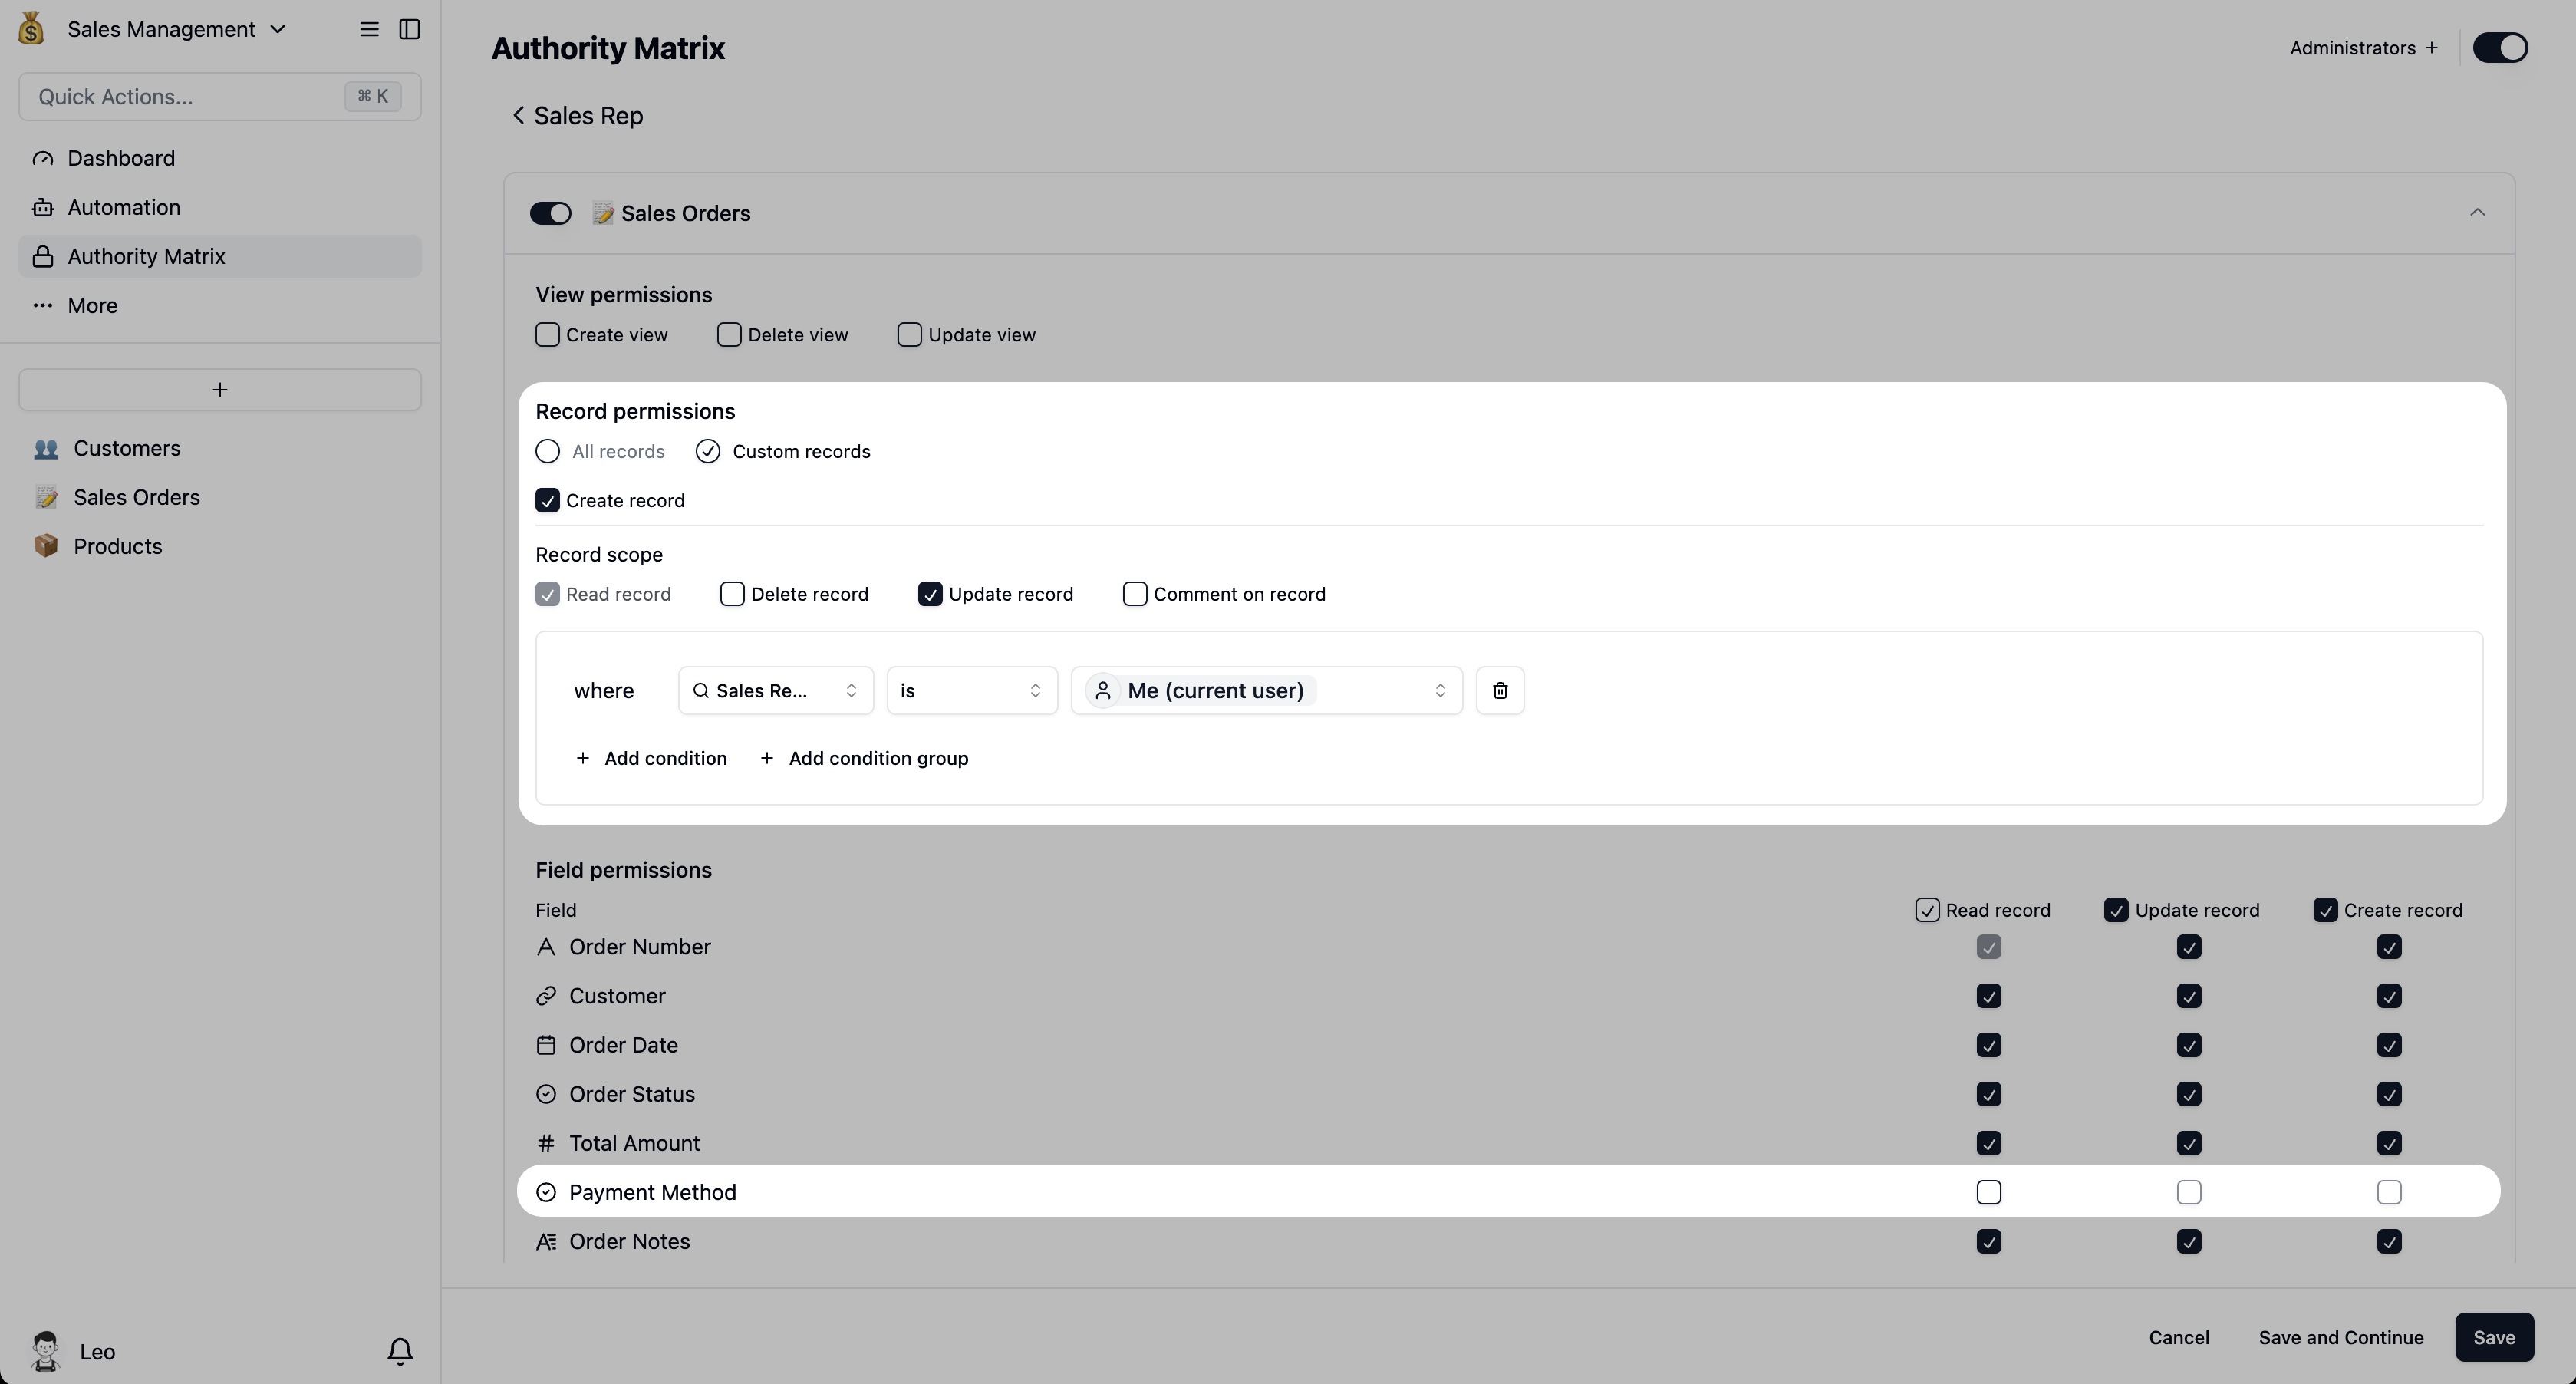
Sales Orderstable:- Record-level Permissions: Apply the same filter:
Sales RepisCurrent User. - Action Permissions: Check
View recordsandCreate records. To protect historical data, you can leaveUpdate recordsandDelete recordsunchecked. - Field-level Permissions: If you don’t want reps to see sensitive information, you can hide specific fields. For example, find the
Payment Methodfield and uncheck theView data in this fieldpermission. - Click the
Savebutton in the bottom-left corner to apply the settings.
- Record-level Permissions: Apply the same filter:
Once a role is created and configured, enable it using the toggle switch to its left. Then, assign team members to the role using theAdding Members to a RoleAdd UserorAdd from Organizationbuttons.
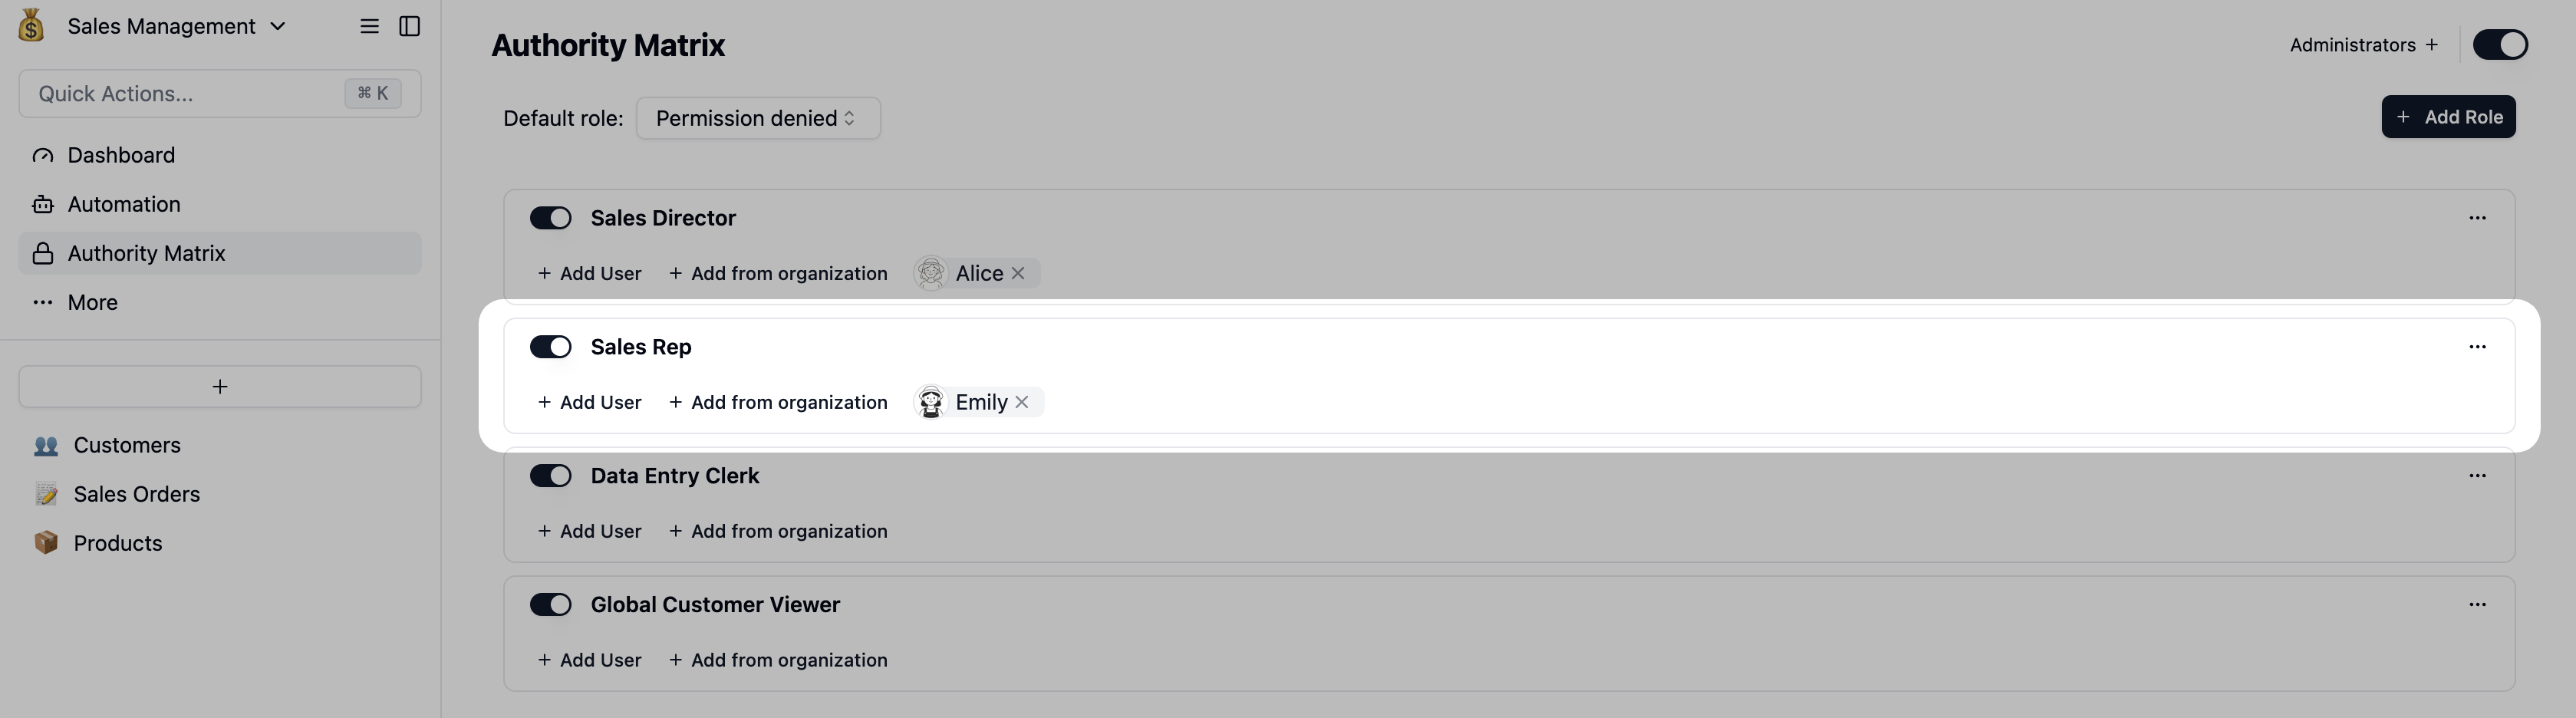 The Sales Rep’s View: After setup, “Sales Rep Emily” can only see and edit his own customers and orders. He can add new customers but cannot delete completed orders.
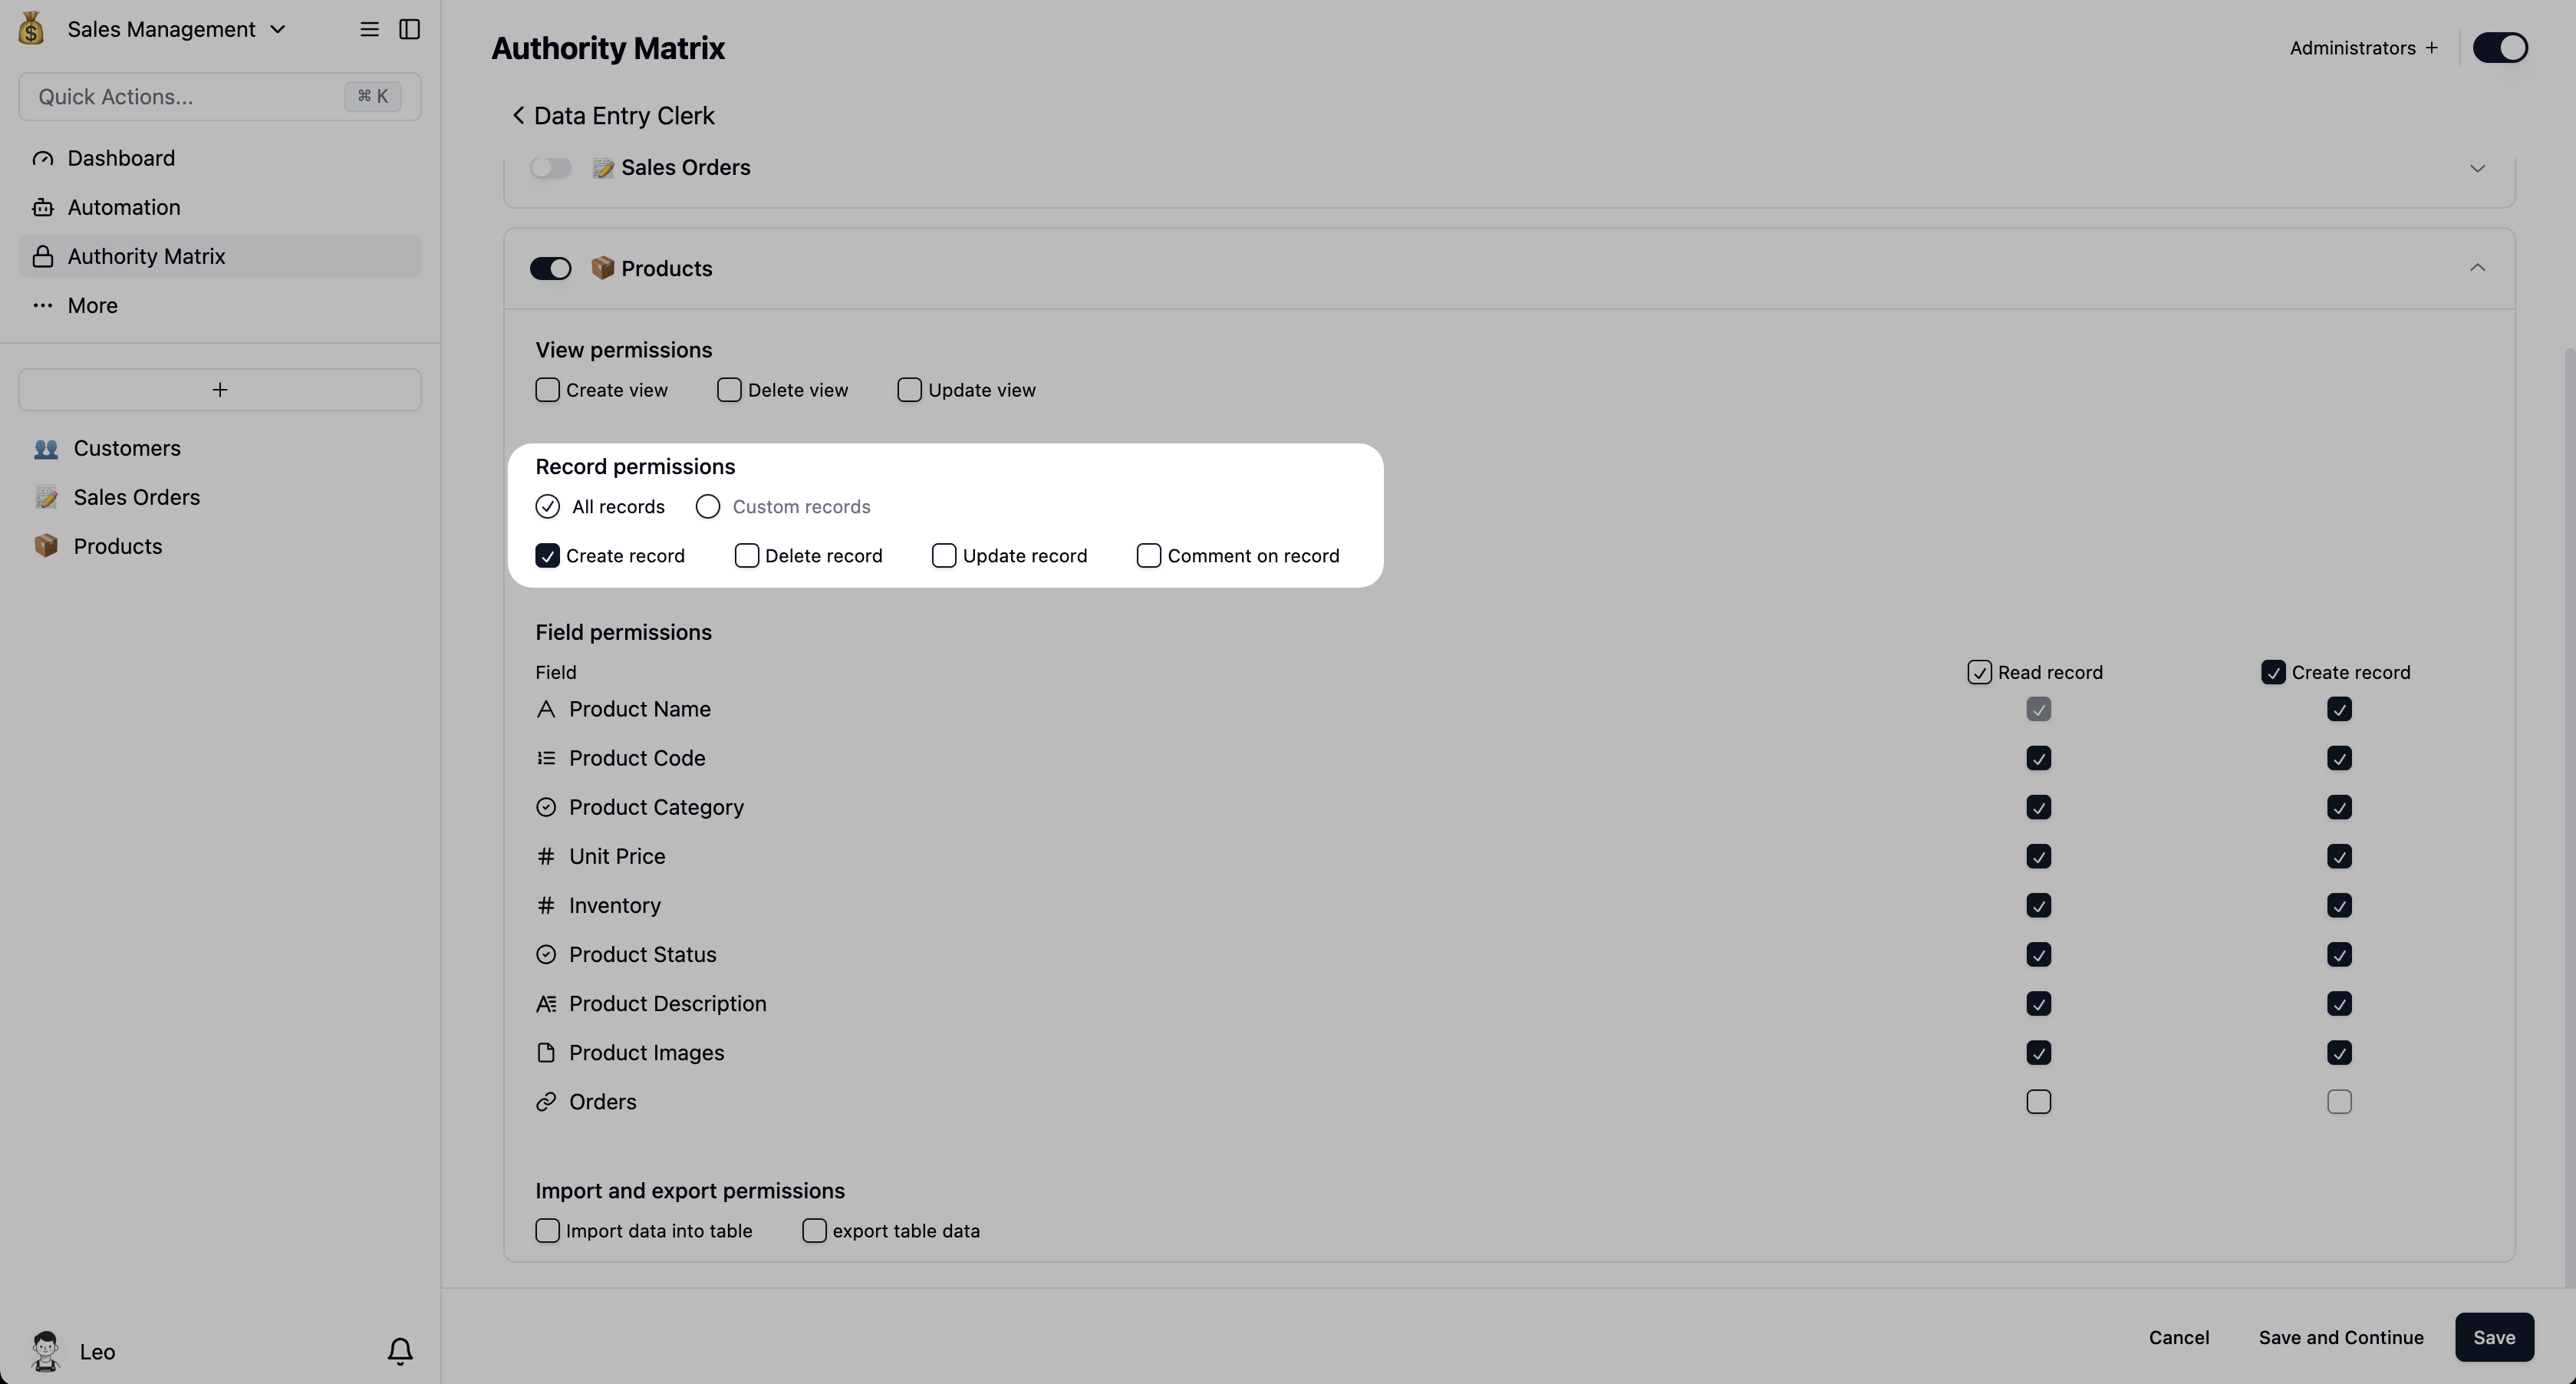
3. Configure the [Data Entry Clerk] Role
This role is highly restricted and focused on a single task.
- For the
Productstable:- Action Permissions: Only check
Create records. - This ensures they can only add new rows (products) to the
Productstable. They cannot see, edit, or delete any existing product data. - Field-level Permissions: To prevent them from seeing linked order data, find the
Orderslinked field and uncheck theView data in this fieldpermission.
- Action Permissions: Only check
- For the
CustomersandSales Orderstables:- Leave the permission toggles off (the default “no access” state). They will not be able to see these tables at all.
Once a role is created and configured, enable it using the toggle switch to its left. Then, assign team members to the role using theAdding Members to a RoleAdd UserorAdd from Organizationbuttons.
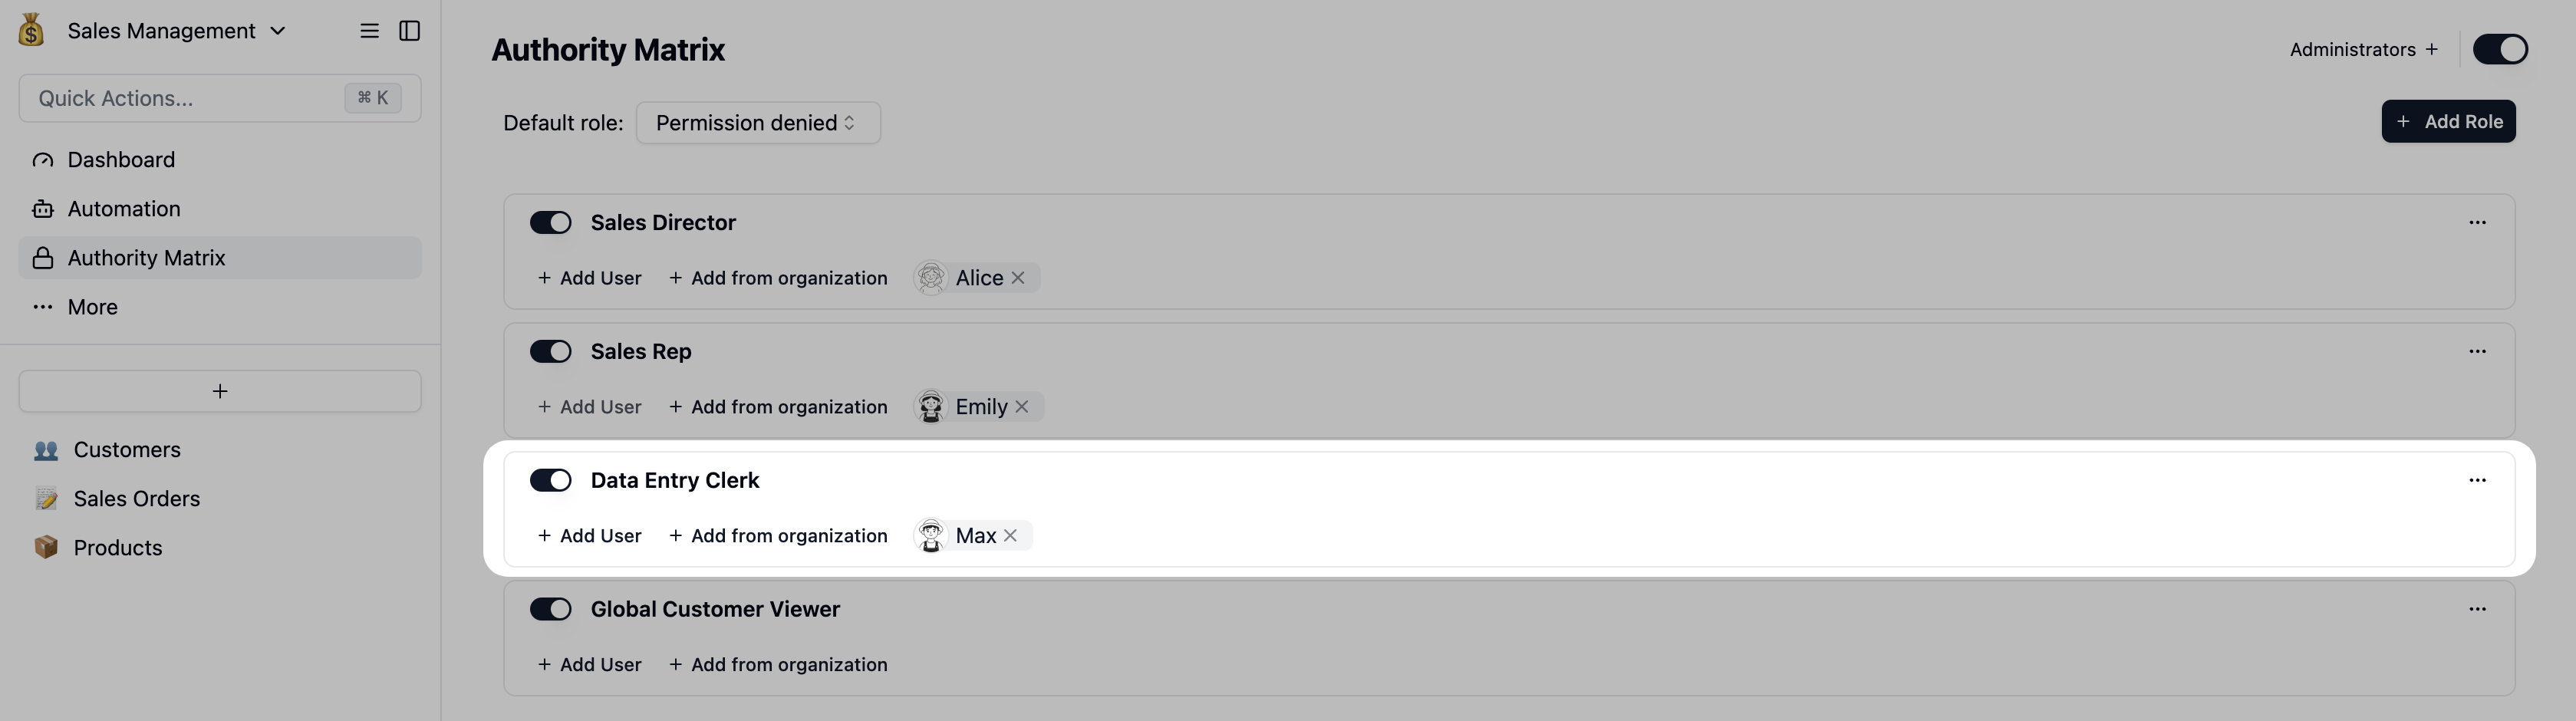 The Data Entry Clerk’s View: Once configured, “Data Entry Clerk Alex Ray” can only add new products. They cannot modify or delete existing ones and have no visibility into customer or order information.
By default, sales reps are often restricted to seeing only their own customers. But in the real world, collaboration and shared learning are vital. For instance, during a weekly sales review, you might want reps to see everyone’s customer data to learn from their peers, while still ensuring they can only edit their own accounts. Here’s how to implement this granular control using the Authority Matrix: Goal:Advanced Technique: Balancing Sales Collaboration with Data SecurityThe Strategy: This is a clever and common approach: instead of modifying the existing
- View Permissions: The
Sales Reprole can view all customer records in the company.- Edit Permissions: The
Sales Reprole can only edit or delete customer records they own.Sales Reprole, we’ll create a new, dedicated “viewer” role. This works because our permission system allows different filters to be applied to different actions ([View], [Update], [Delete], etc.). Configuration Steps:Step 1: Create a new “Viewer” role
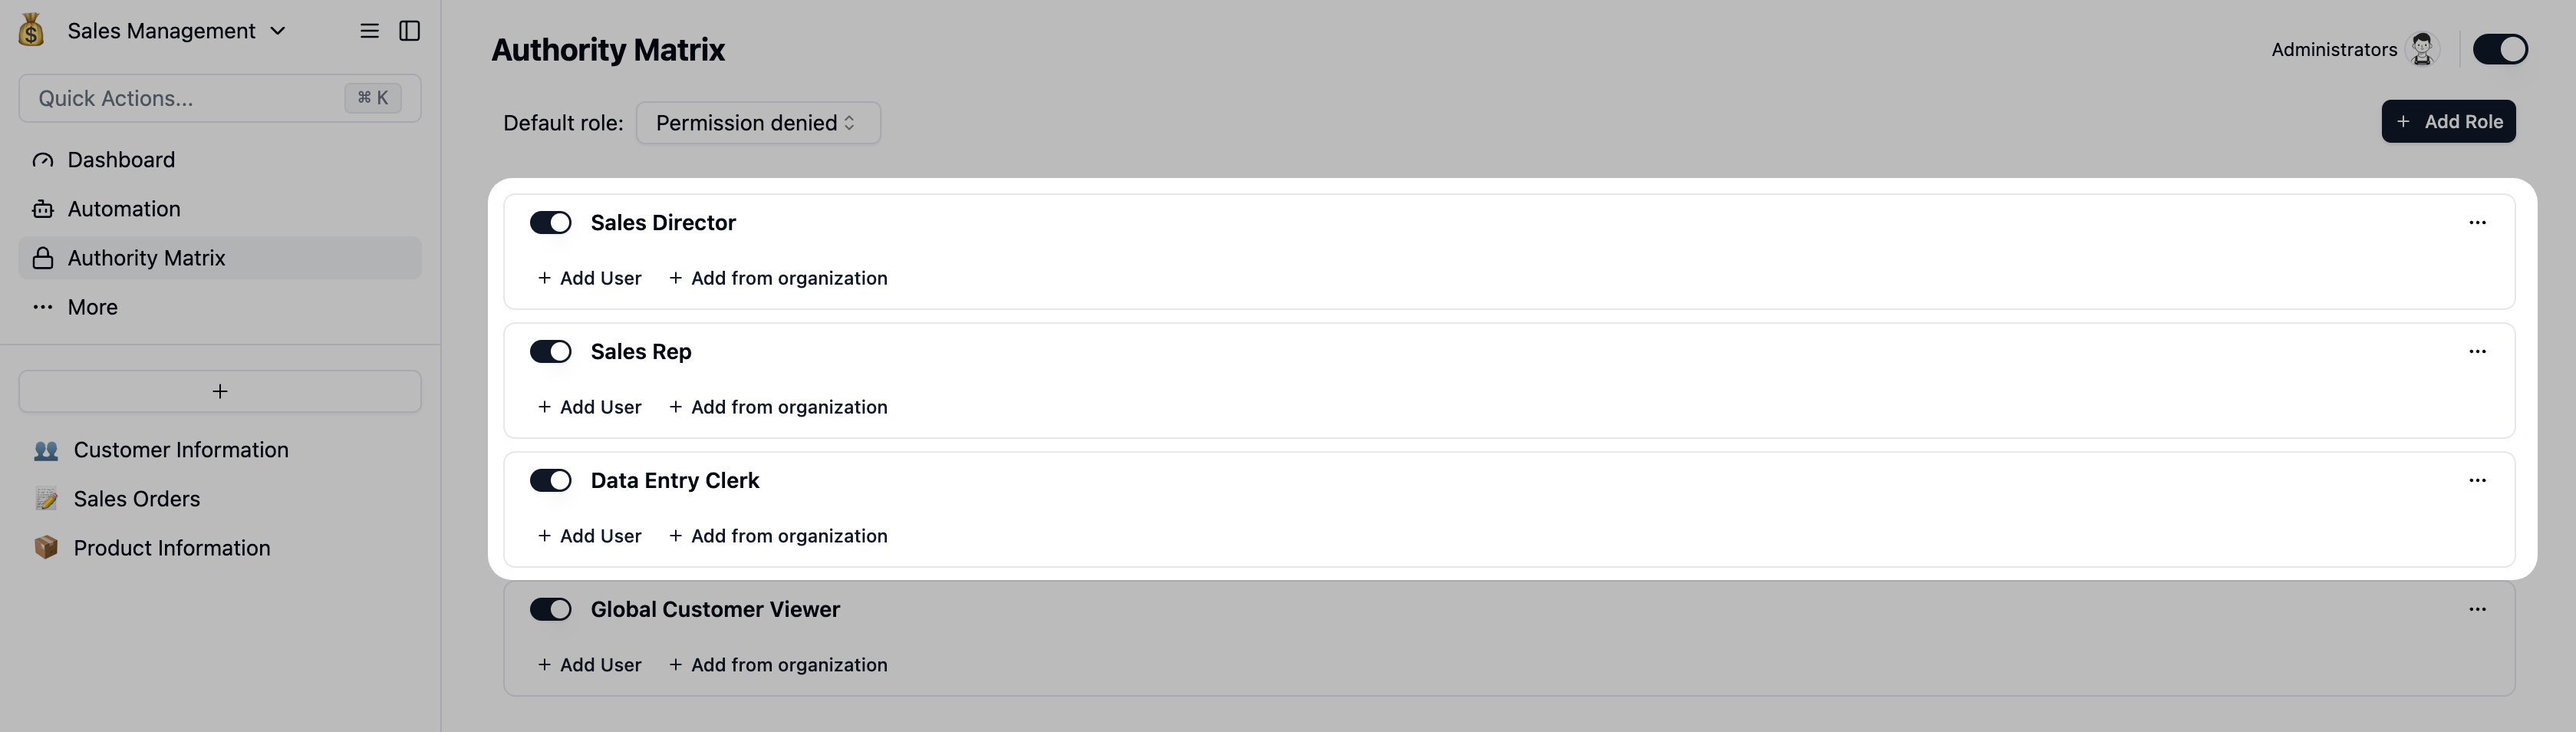
- In the Authority Matrix, click
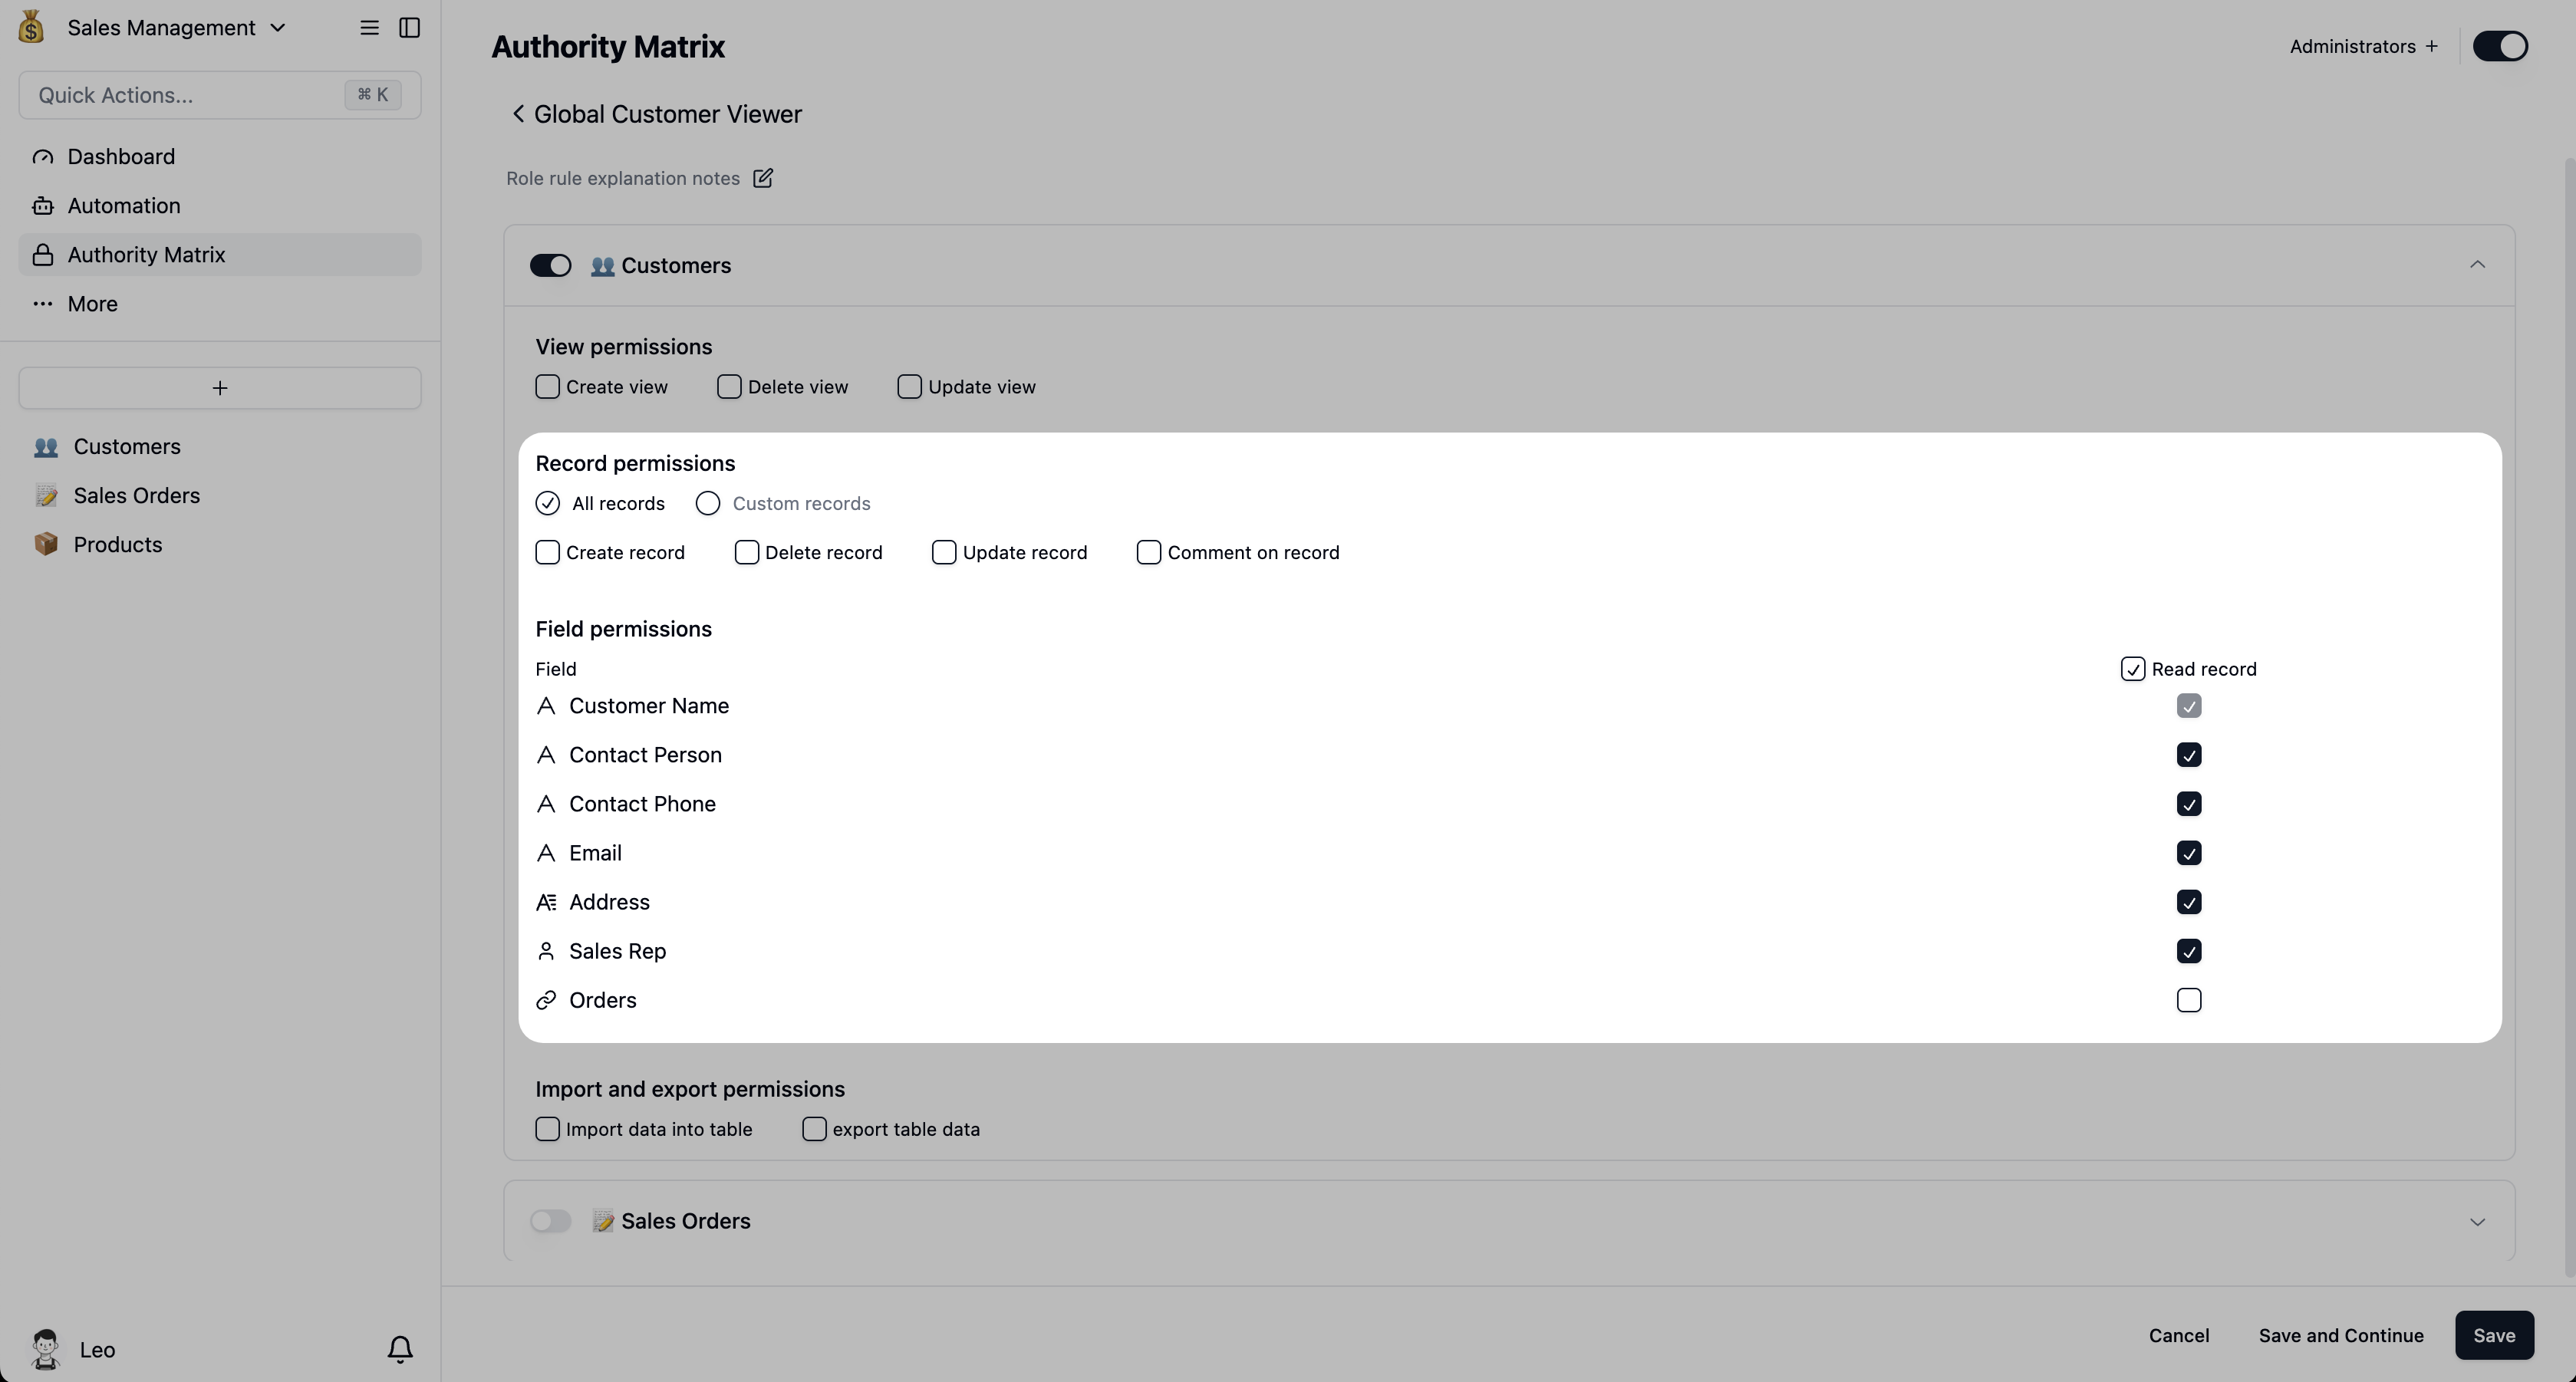
Add Roleand name it something likeGlobal Customer Viewer.Step 2: Configure read-only permissions for the new role
- Click the
Global Customer Viewerrole to open its settings.- Go to the
Customerstable.- Action Permissions: Check
View recordsONLY. Ensure thatUpdate records,Delete records, andCreate recordsare all unchecked.- Record-level Permissions: Do not apply any filters. Leaving the filter section empty means the role grants access to all records in the table.
Step 3: Add “Emily” to the new role
- Return to the main Authority Matrix screen.
- Next to the
Global Customer Viewerrole, click+ Add Userand add your sales rep (e.g., “Emily”).The Result: Now, when Sales Rep “Emily” logs in, he has the permissions of both roles:
- Full Visibility: When he opens the
Customerstable, he can see every customer in the company, giving him a complete overview for analysis and team reviews.- Complete Security: When he double-clicks a record owned by another rep, he’ll see that all fields are read-only (often grayed out and uneditable). There are no “Save,” “Edit,” or “Delete” buttons available. This completely eliminates the risk of accidental changes, allowing him to browse and present data with confidence.