Overview
Teable’s automation feature is a powerful tool that allows users to create automated workflows to improve efficiency and reduce repetitive tasks
Overview
Automation consists of several key components:
- Triggers: Define when to initiate the automation process. Can be based on changes in the base, time, or external events.
- Actions: Specify operations to execute after a trigger is activated. Can include data operations, sending notifications, or integration with external systems.
- Conditions: Allow adding logical decisions between triggers and actions for more precise control.
- Testing: Provides functionality to test automation processes before actual deployment, ensuring they work as expected.
- Execution Logs: Record automation run history for monitoring and troubleshooting.
Creating Automation Workflows
Here are the steps to create an automation workflow:
1. Create a Trigger
- Choose a trigger type, such as “When Record Updates”.
- Select the table to monitor.
- Choose specific fields to monitor.
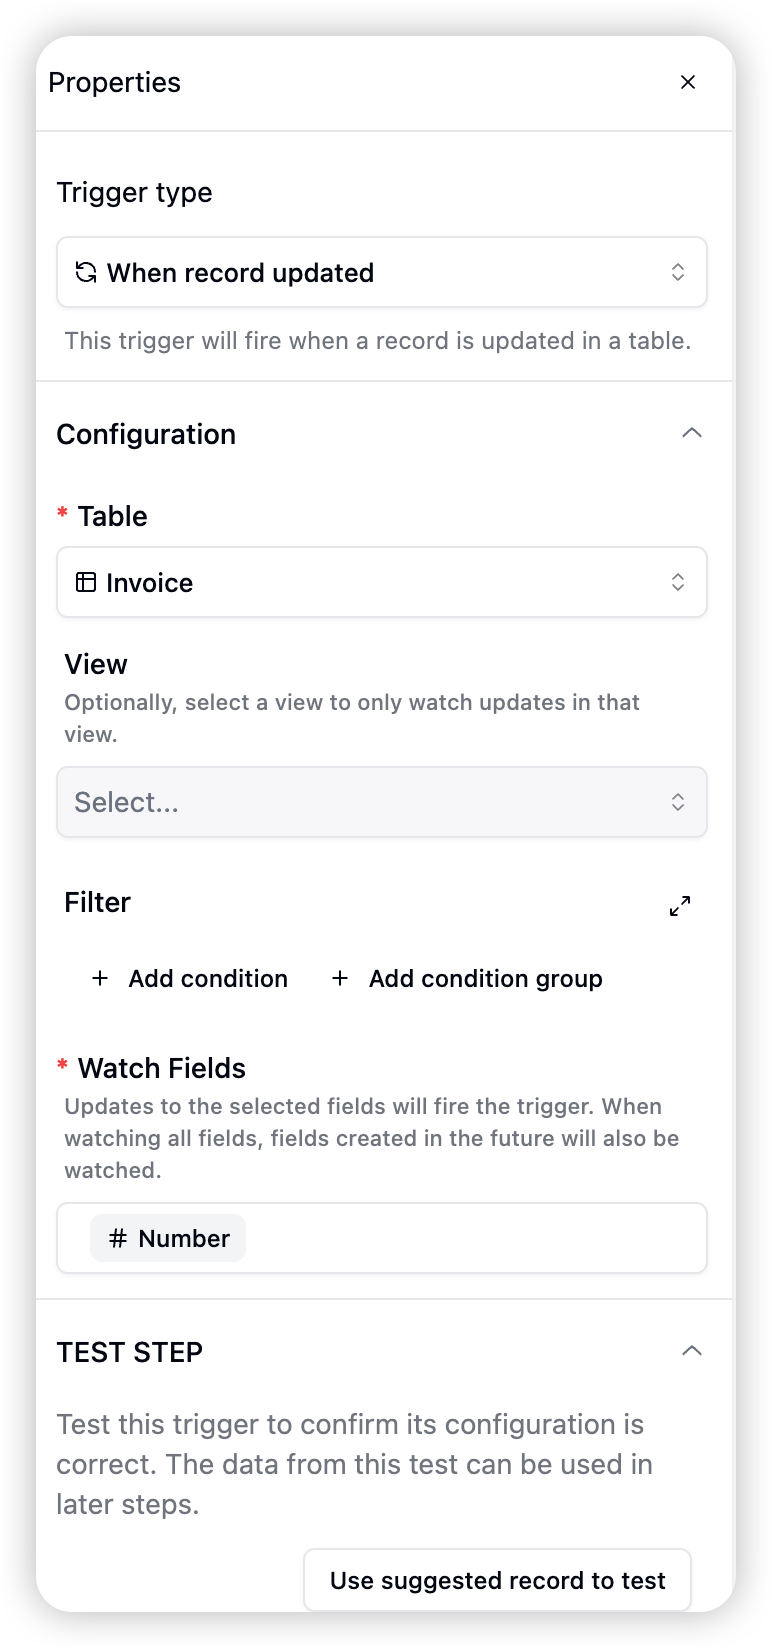
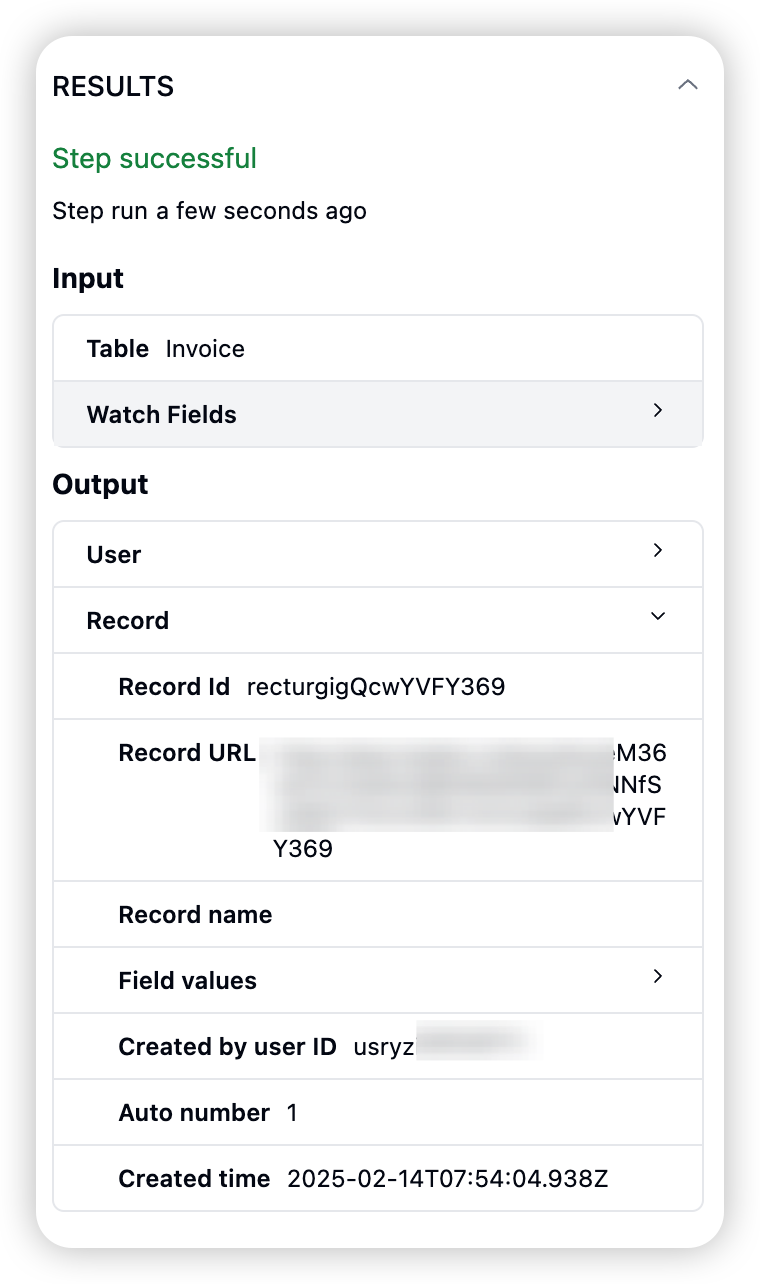
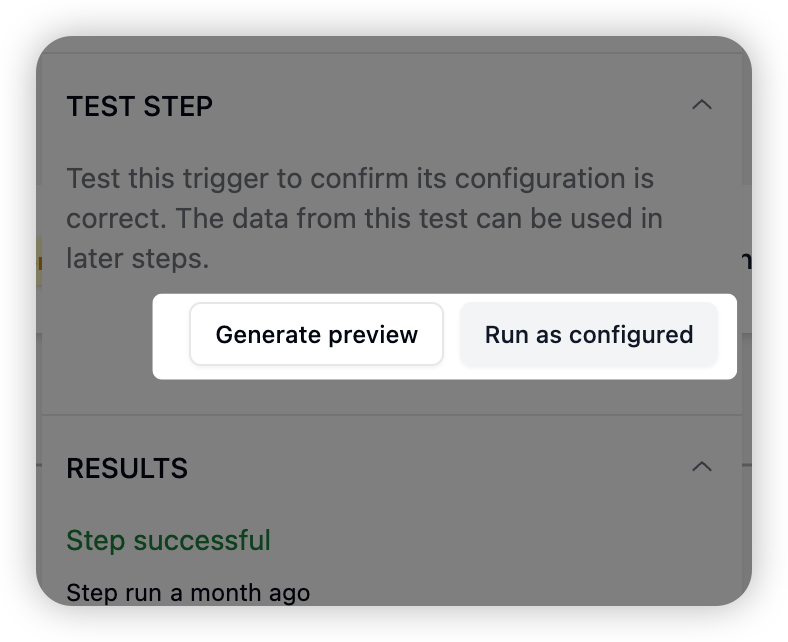
- After configuration, click the “Test” button.
- The system will display the trigger test results, typically showing the content of a current record in the table.
2. Create an Action
-
Select an action type, such as “Create Record in Another Table”
-
Choose the target table.
-
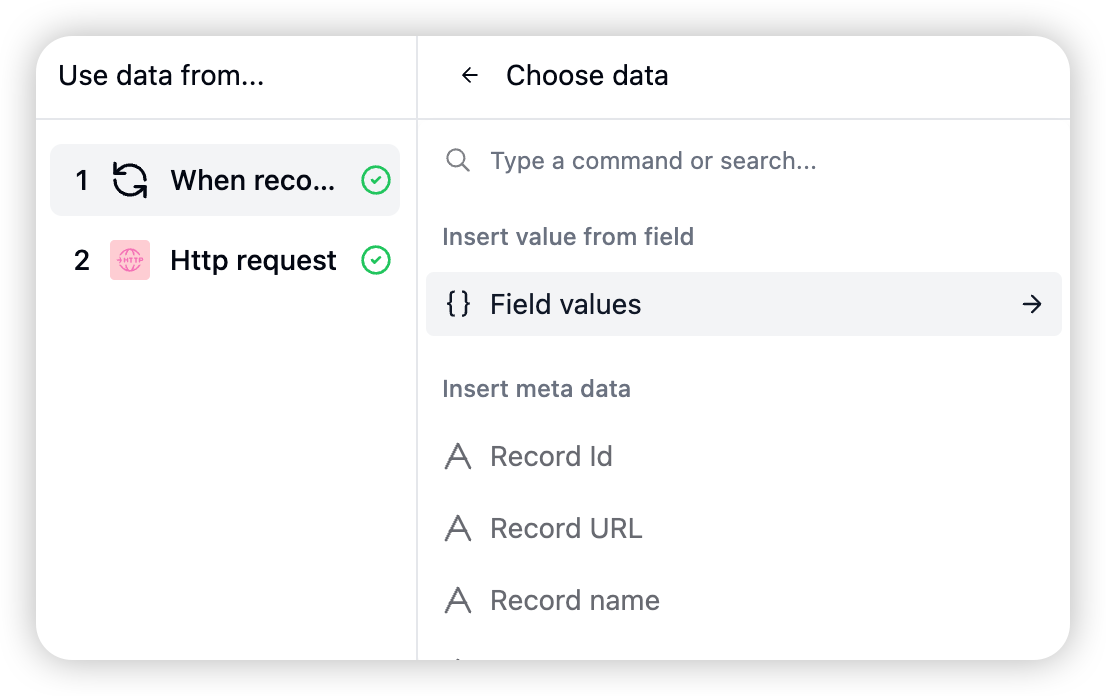
Configure field values for the new record
-
Select values from the trigger’s dynamic record.
-
Click the “Generate Preview” button to validate the action configuration. Or click “Run as Configured” to create an actual record and get the return value
3. Add Conditions (Optional)
- Create a condition.
- Set up decision rules
- For example, check the value of a specific field.
- Click the “Test” button to validate the condition.
4. Add More Actions (Optional)
- Based on condition results, you can add more actions, such as sending HTTP requests.
- Configure action details.
- Click the “Test” button to validate each newly added action.
5. Start Automation
- After completing all configurations, click the start button in the upper left.
- Confirm to start the automation.
Verify Execution
- Modify a record in the monitored table to trigger the automation.
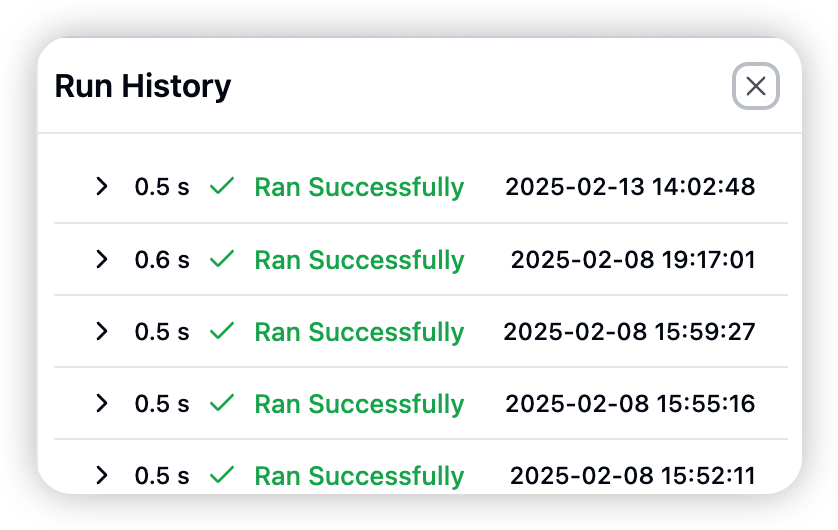
- Return to the automation interface.
- Click “Execution History” to view the logs.
- Check the latest execution record to confirm if the automation executed as expected.
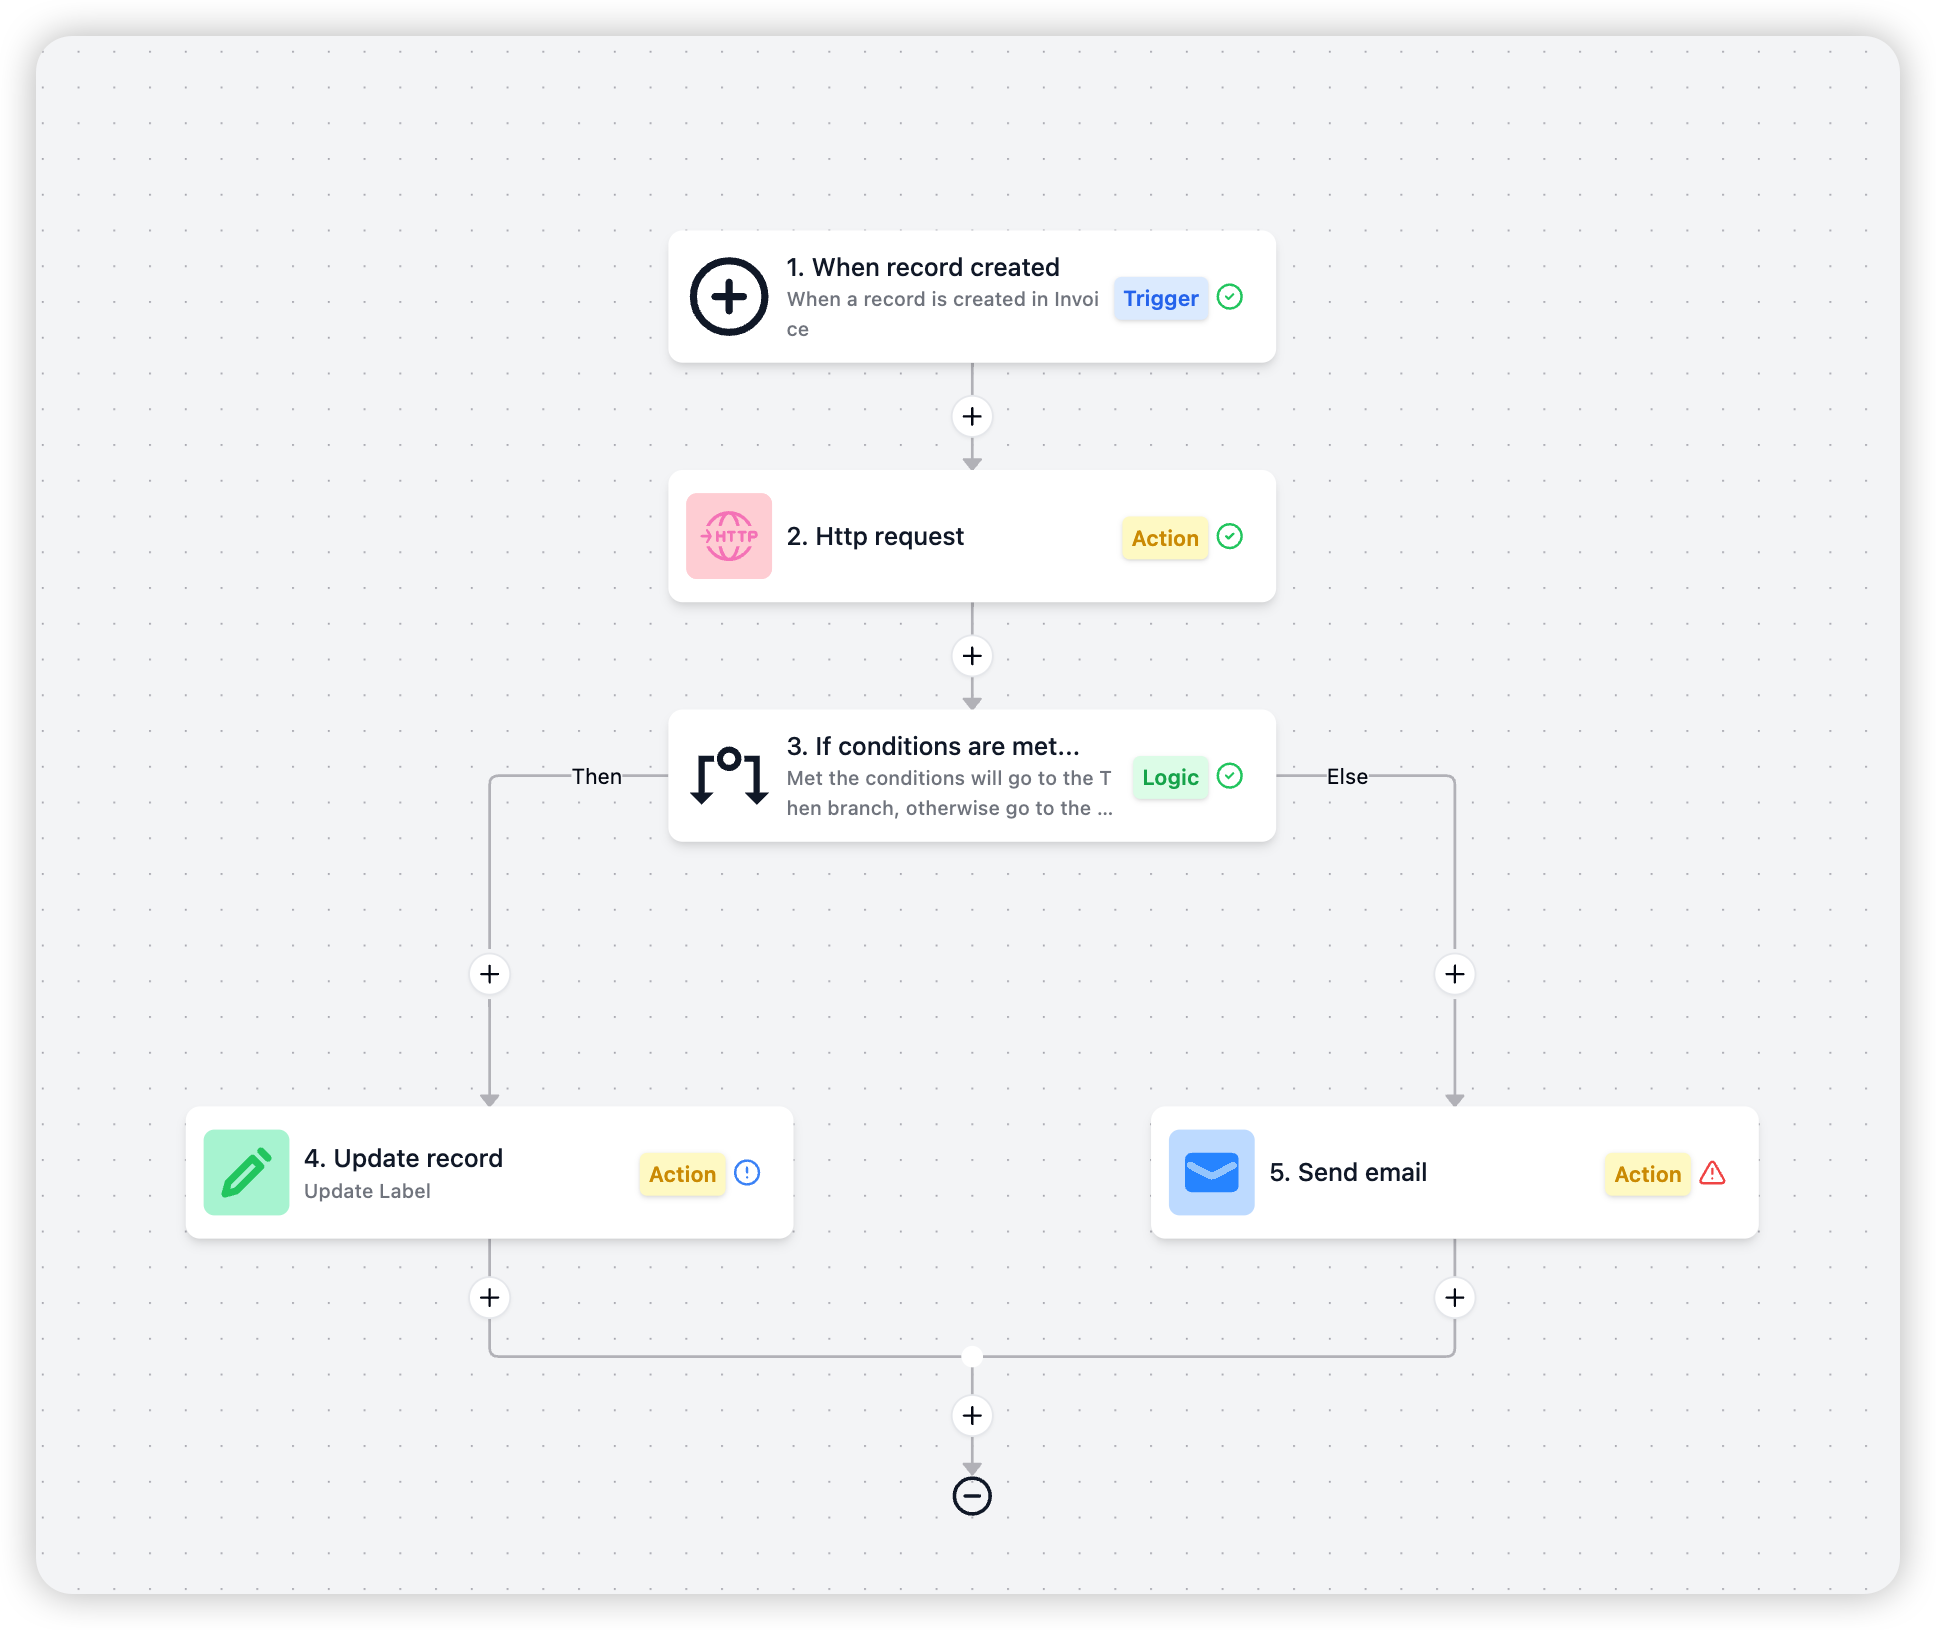
How Automation Workflows Typically Work
- When trigger conditions are met (e.g., a record is modified), the automation is activated.
- The system checks for any set conditions and evaluates them if present.
- If conditions are met (or if no conditions are set), the system executes the defined actions.
- The entire process is recorded in the execution log.
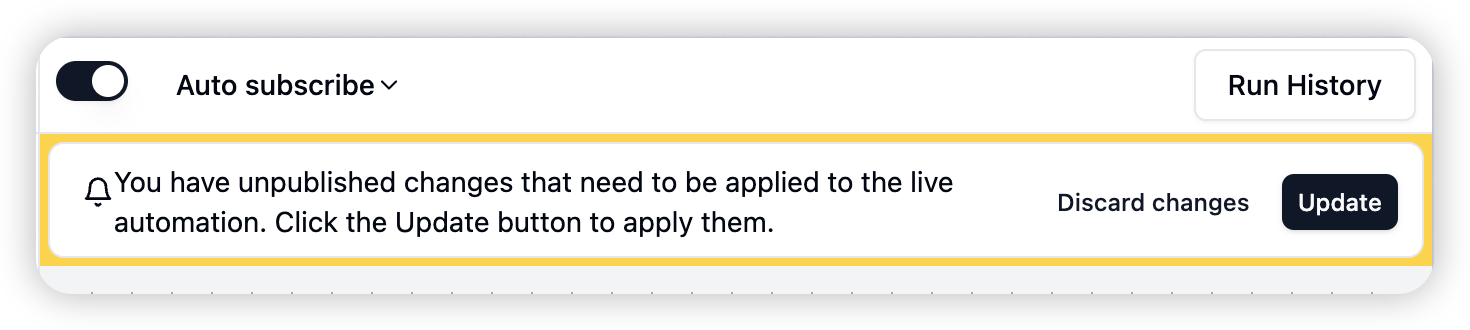
Modifying Automation
When modifying a running automation, for easier debugging, changes to the automation configuration won’t take effect immediately in the running automation. Instead, a prompt will appear on the page, and the automation will only be applied to the running process after you confirm the update. You can safely modify the automation without worrying about accidentally interrupting existing processes.
By combining these elements, users can create complex automation workflows, from simple data updates to complex multi-step business processes. Automation not only saves time but also reduces human error, ensuring process consistency and reliability.
In the following chapters, we’ll explore in detail the functionality, configuration methods, and best practices for each component.